Google Drive backup saves your entire database — invoices, customers, items, and settings — to your Google account. Free users get one backup at no cost. A Plus subscription is required for additional backups.
What You'll Need
Before you start: Have a Google account ready and make sure you're signed in on your device. If you want to back up regularly, you'll need a Plus subscription after your first free backup.
Steps
-
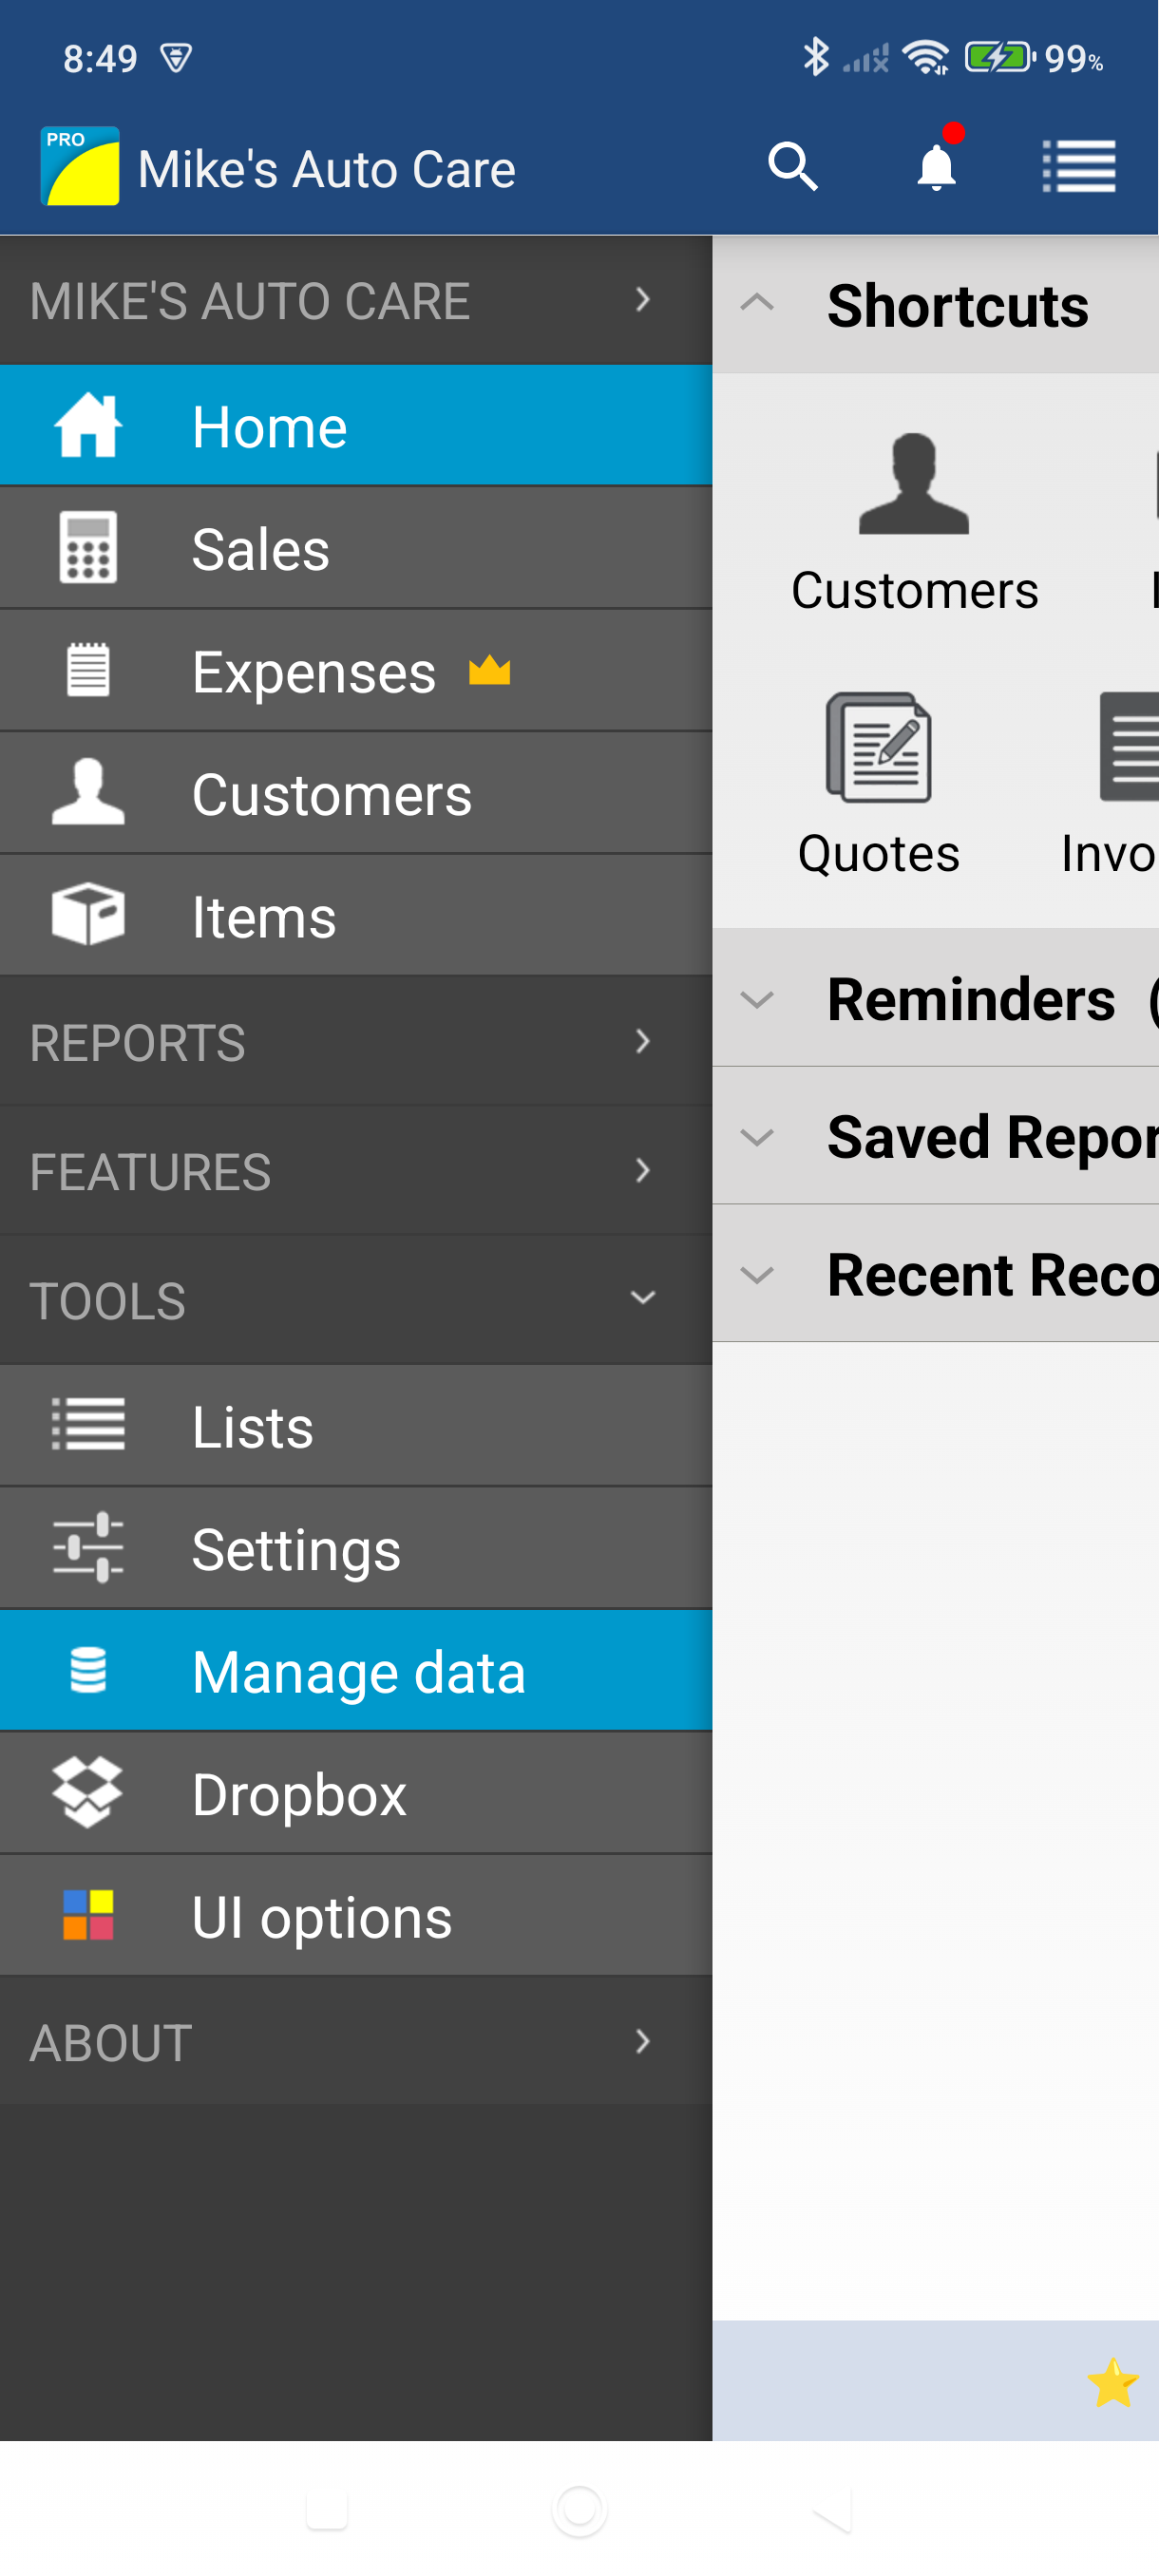
Open the side menu and tap Manage Data.
-
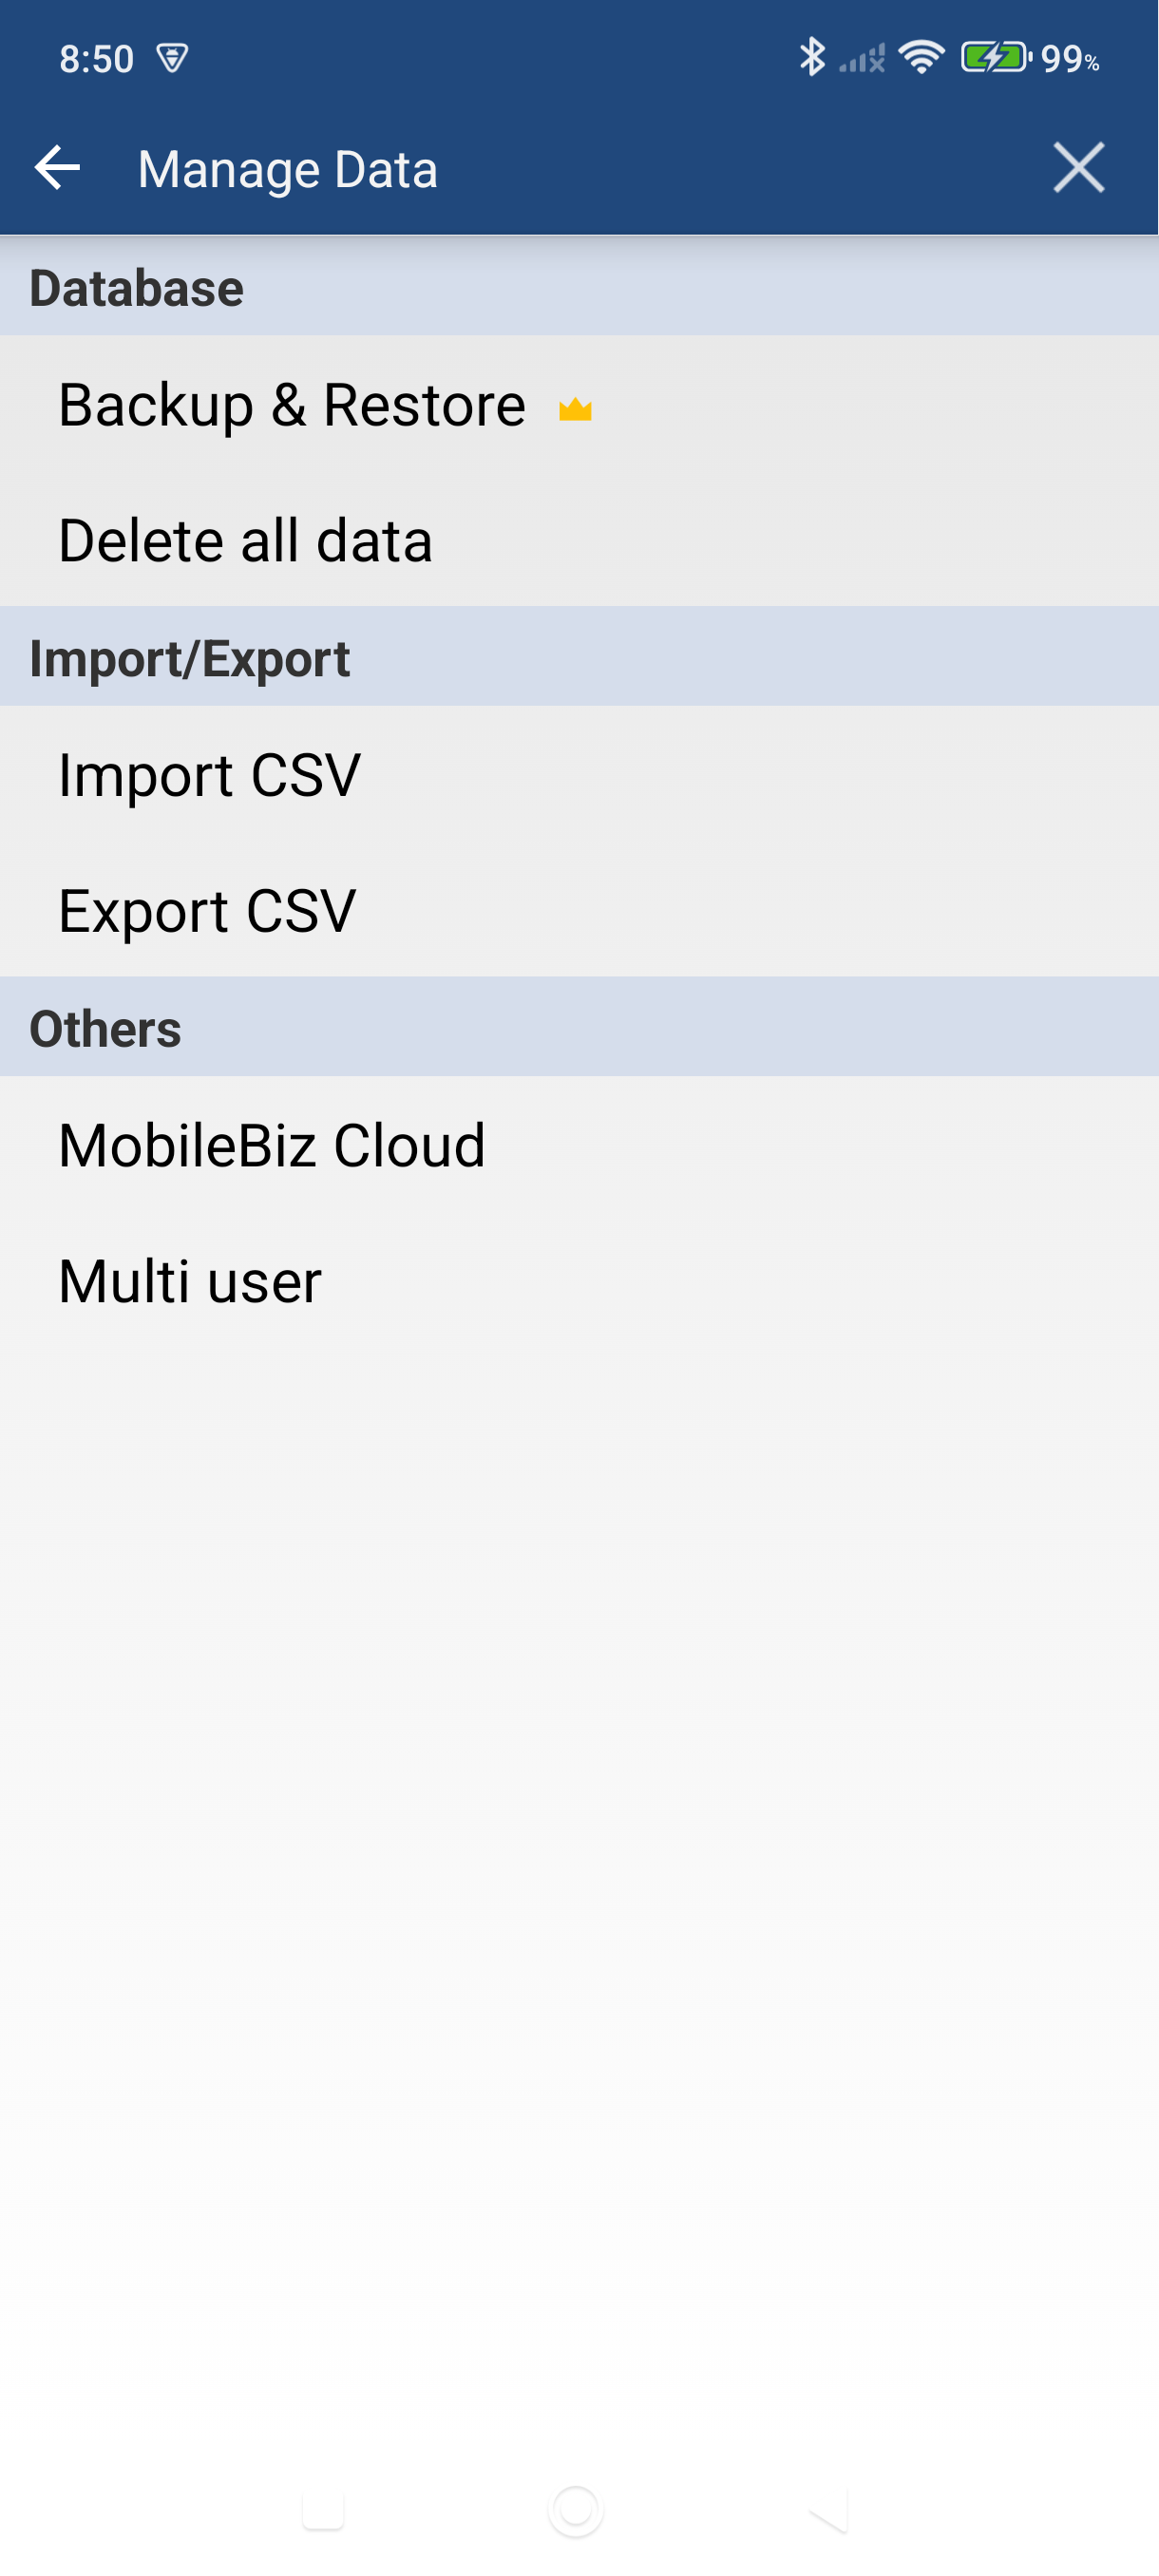
Tap Backup & Restore.
-
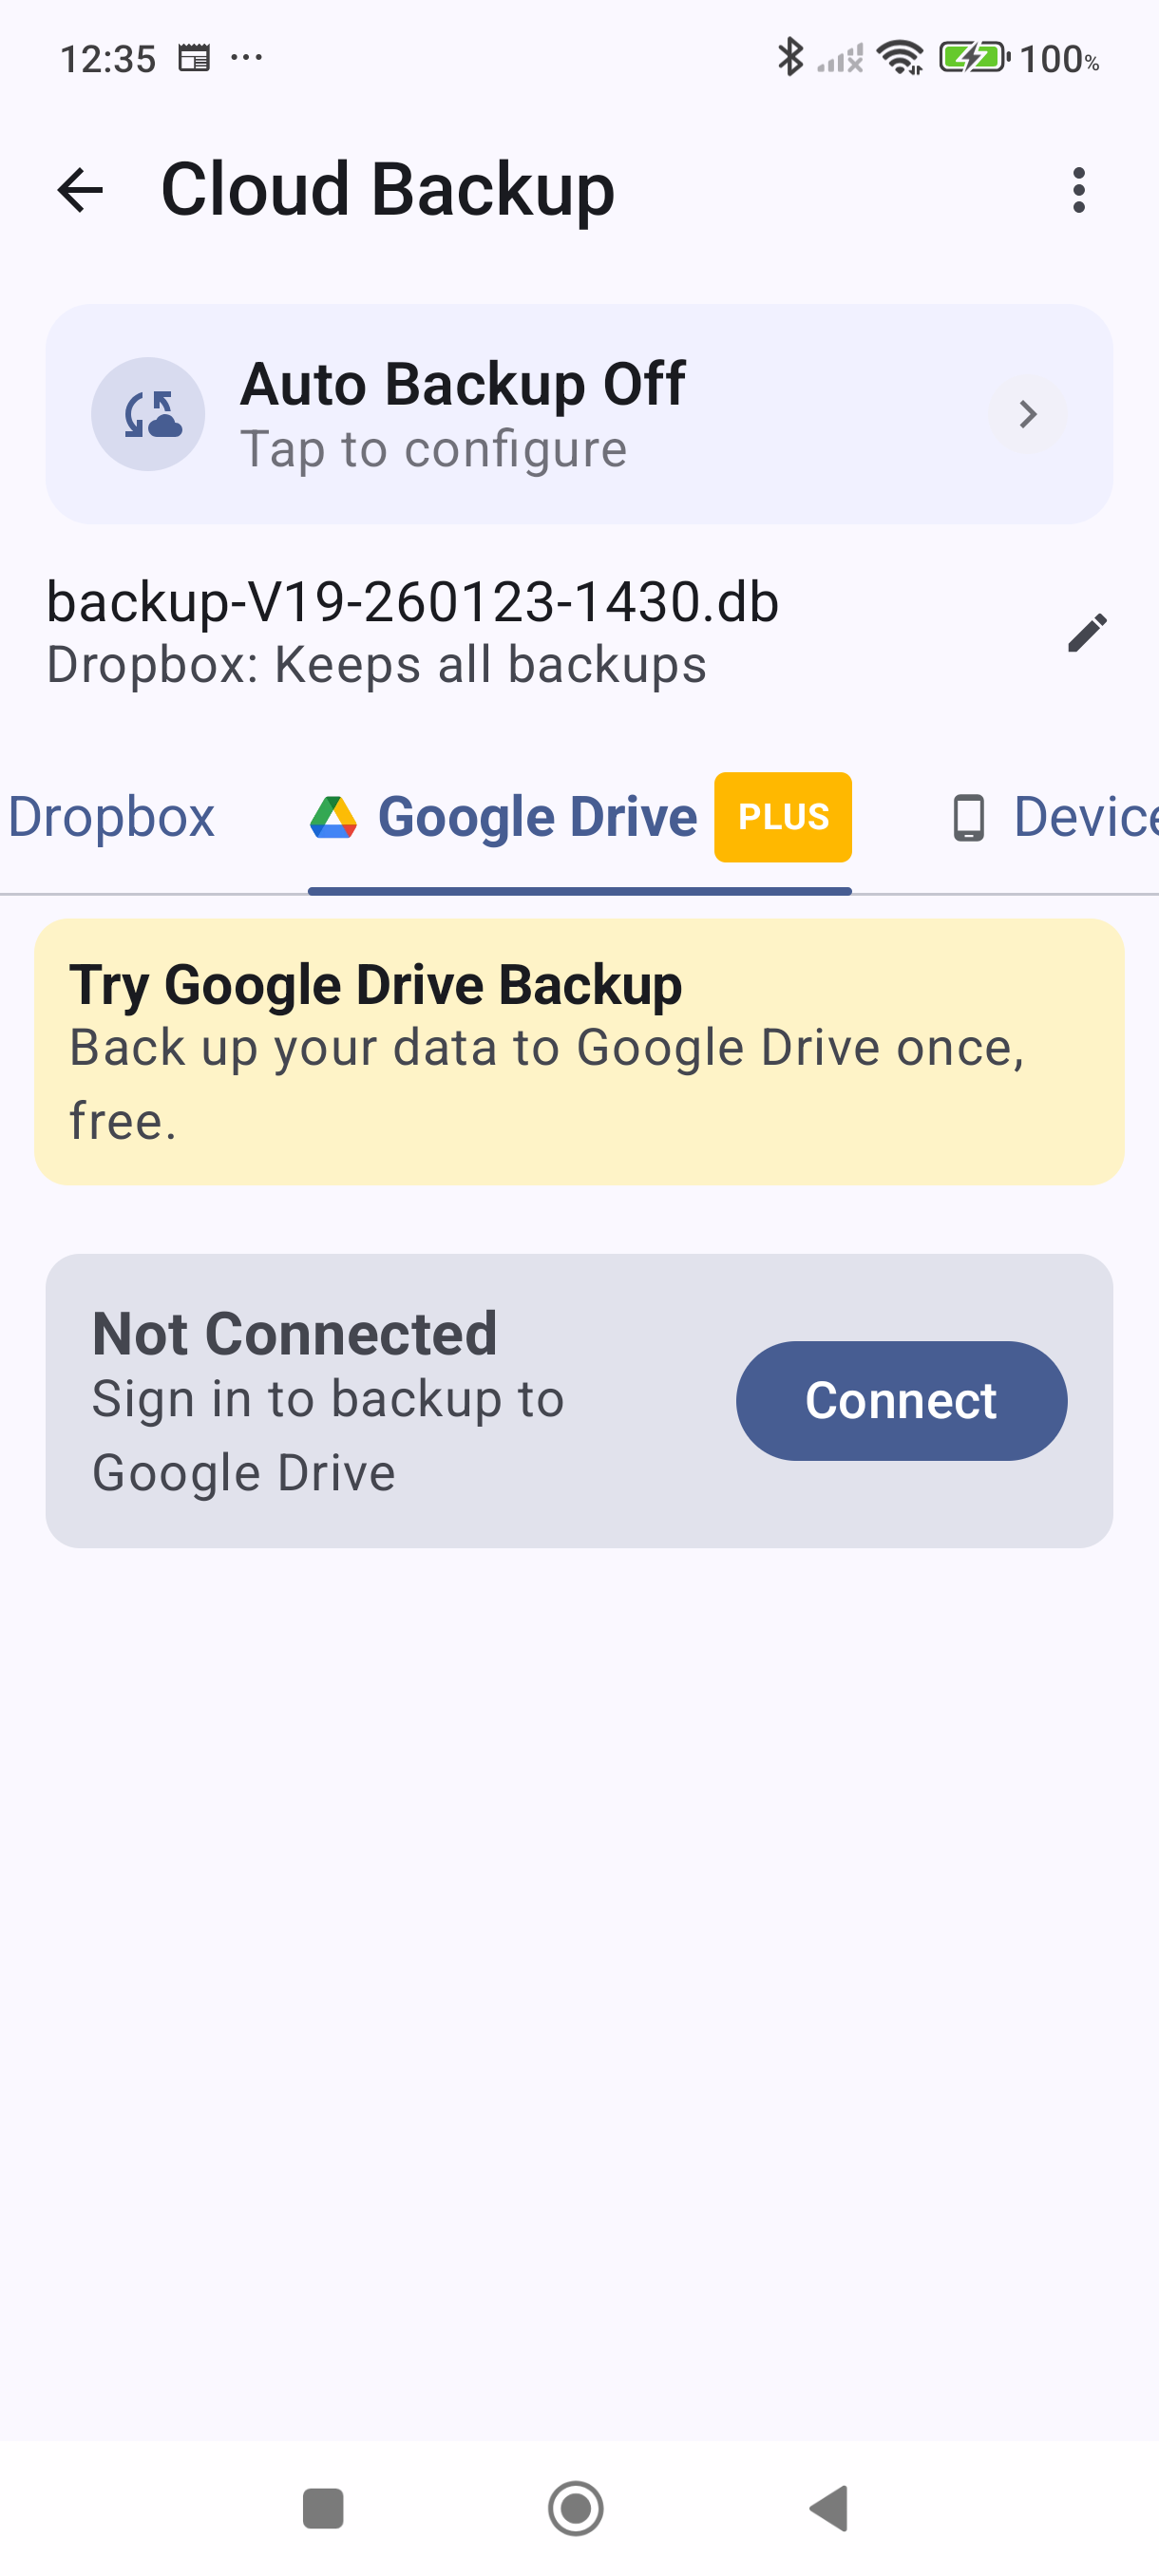
Tap the Google Drive tab.
-
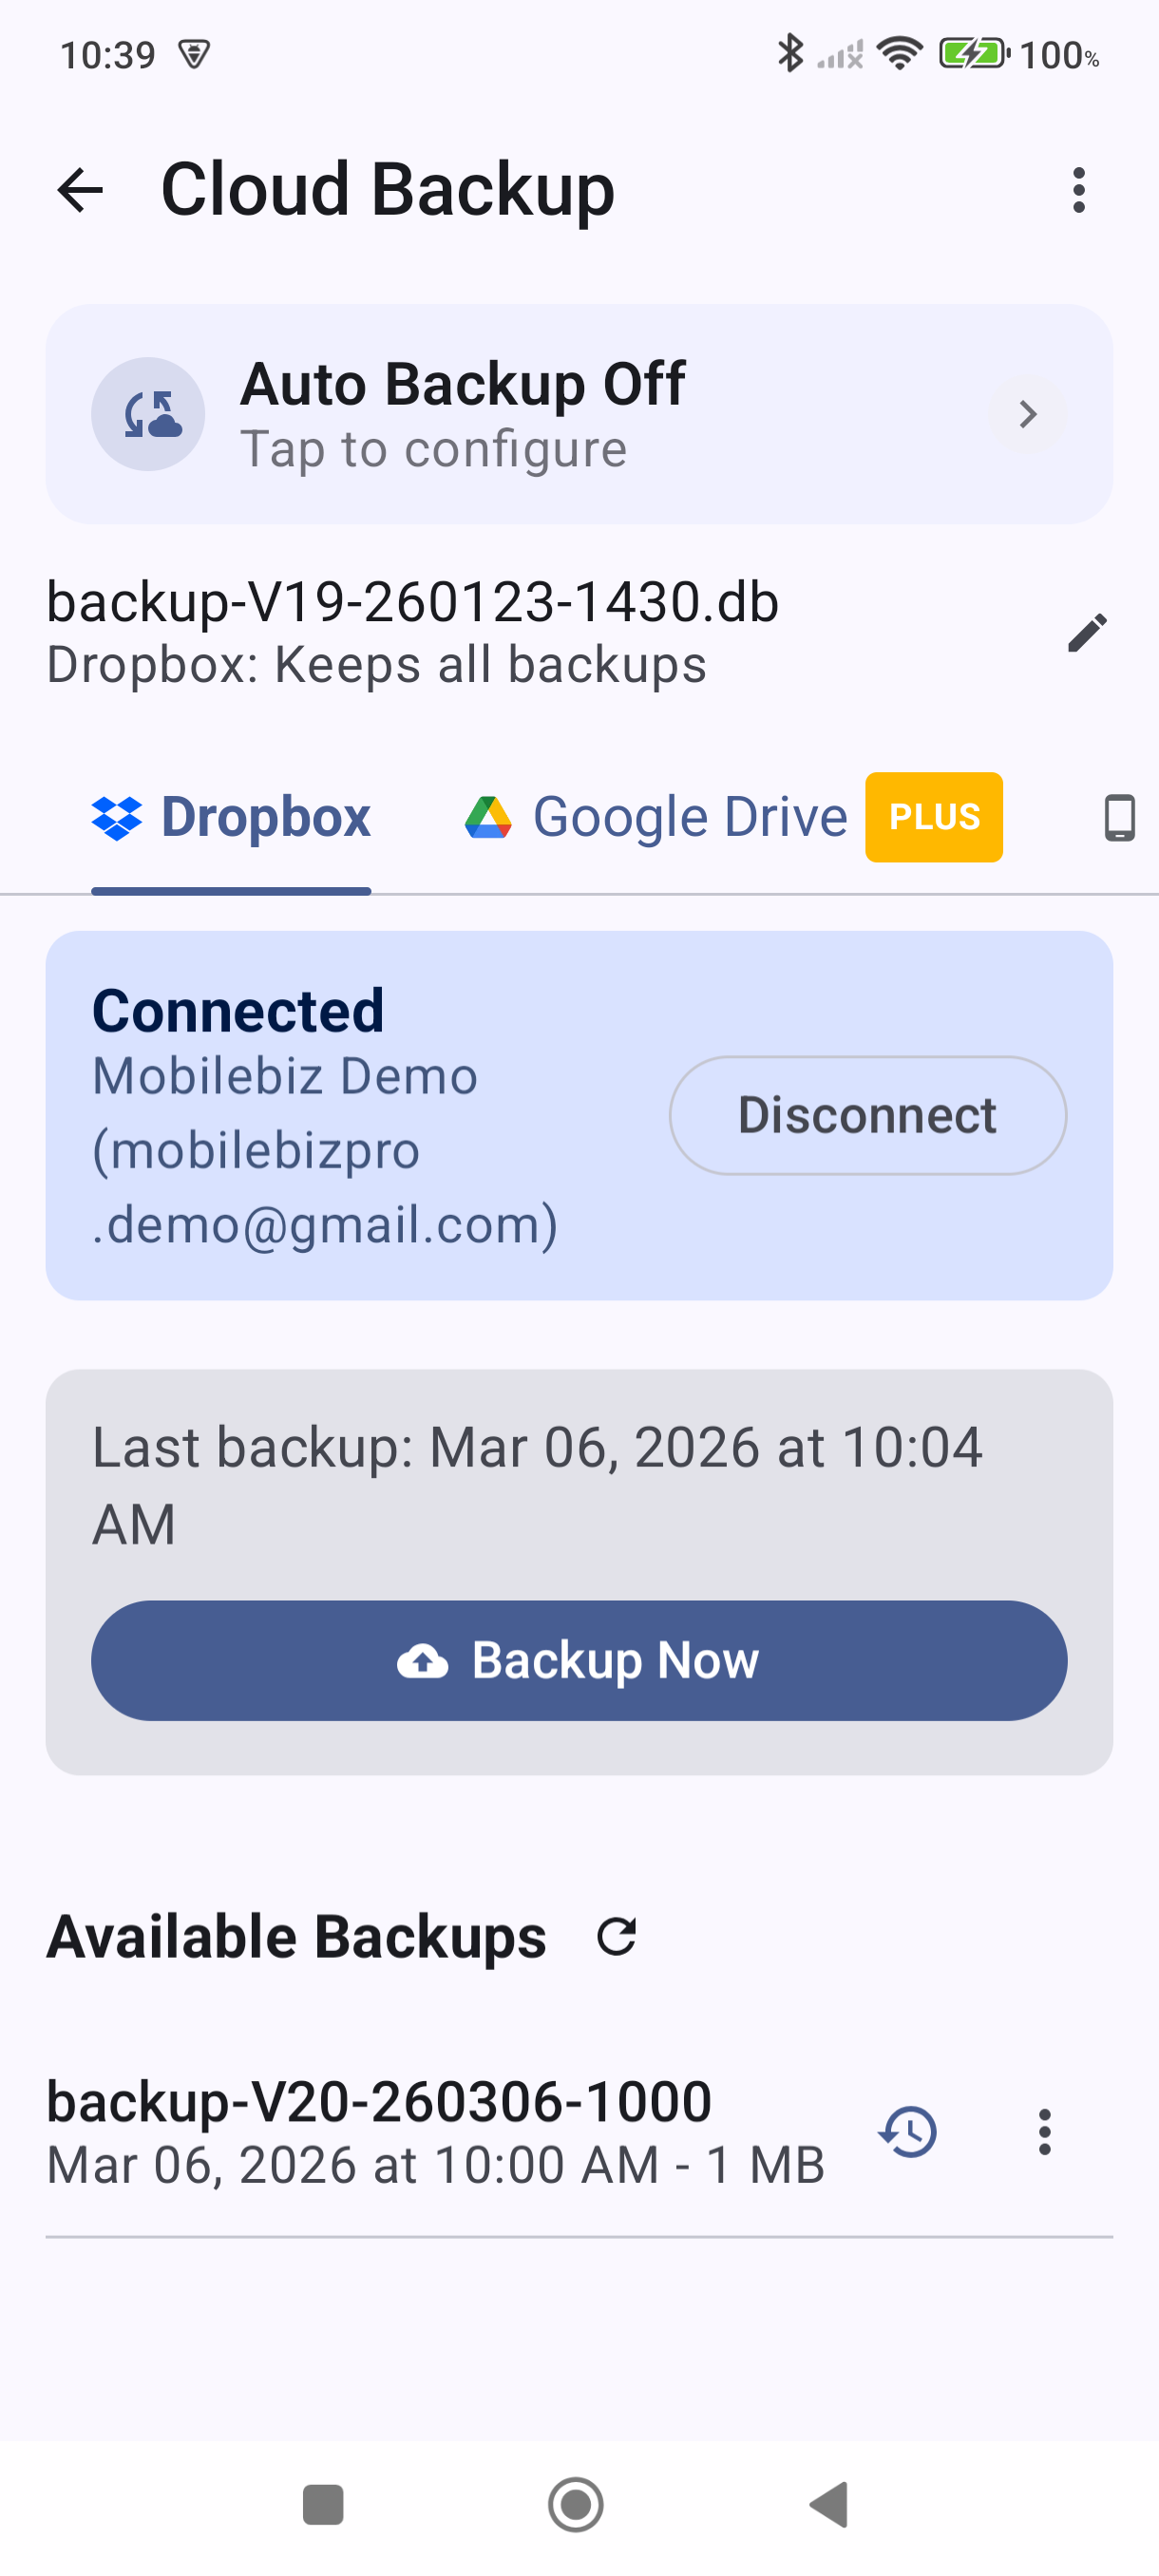
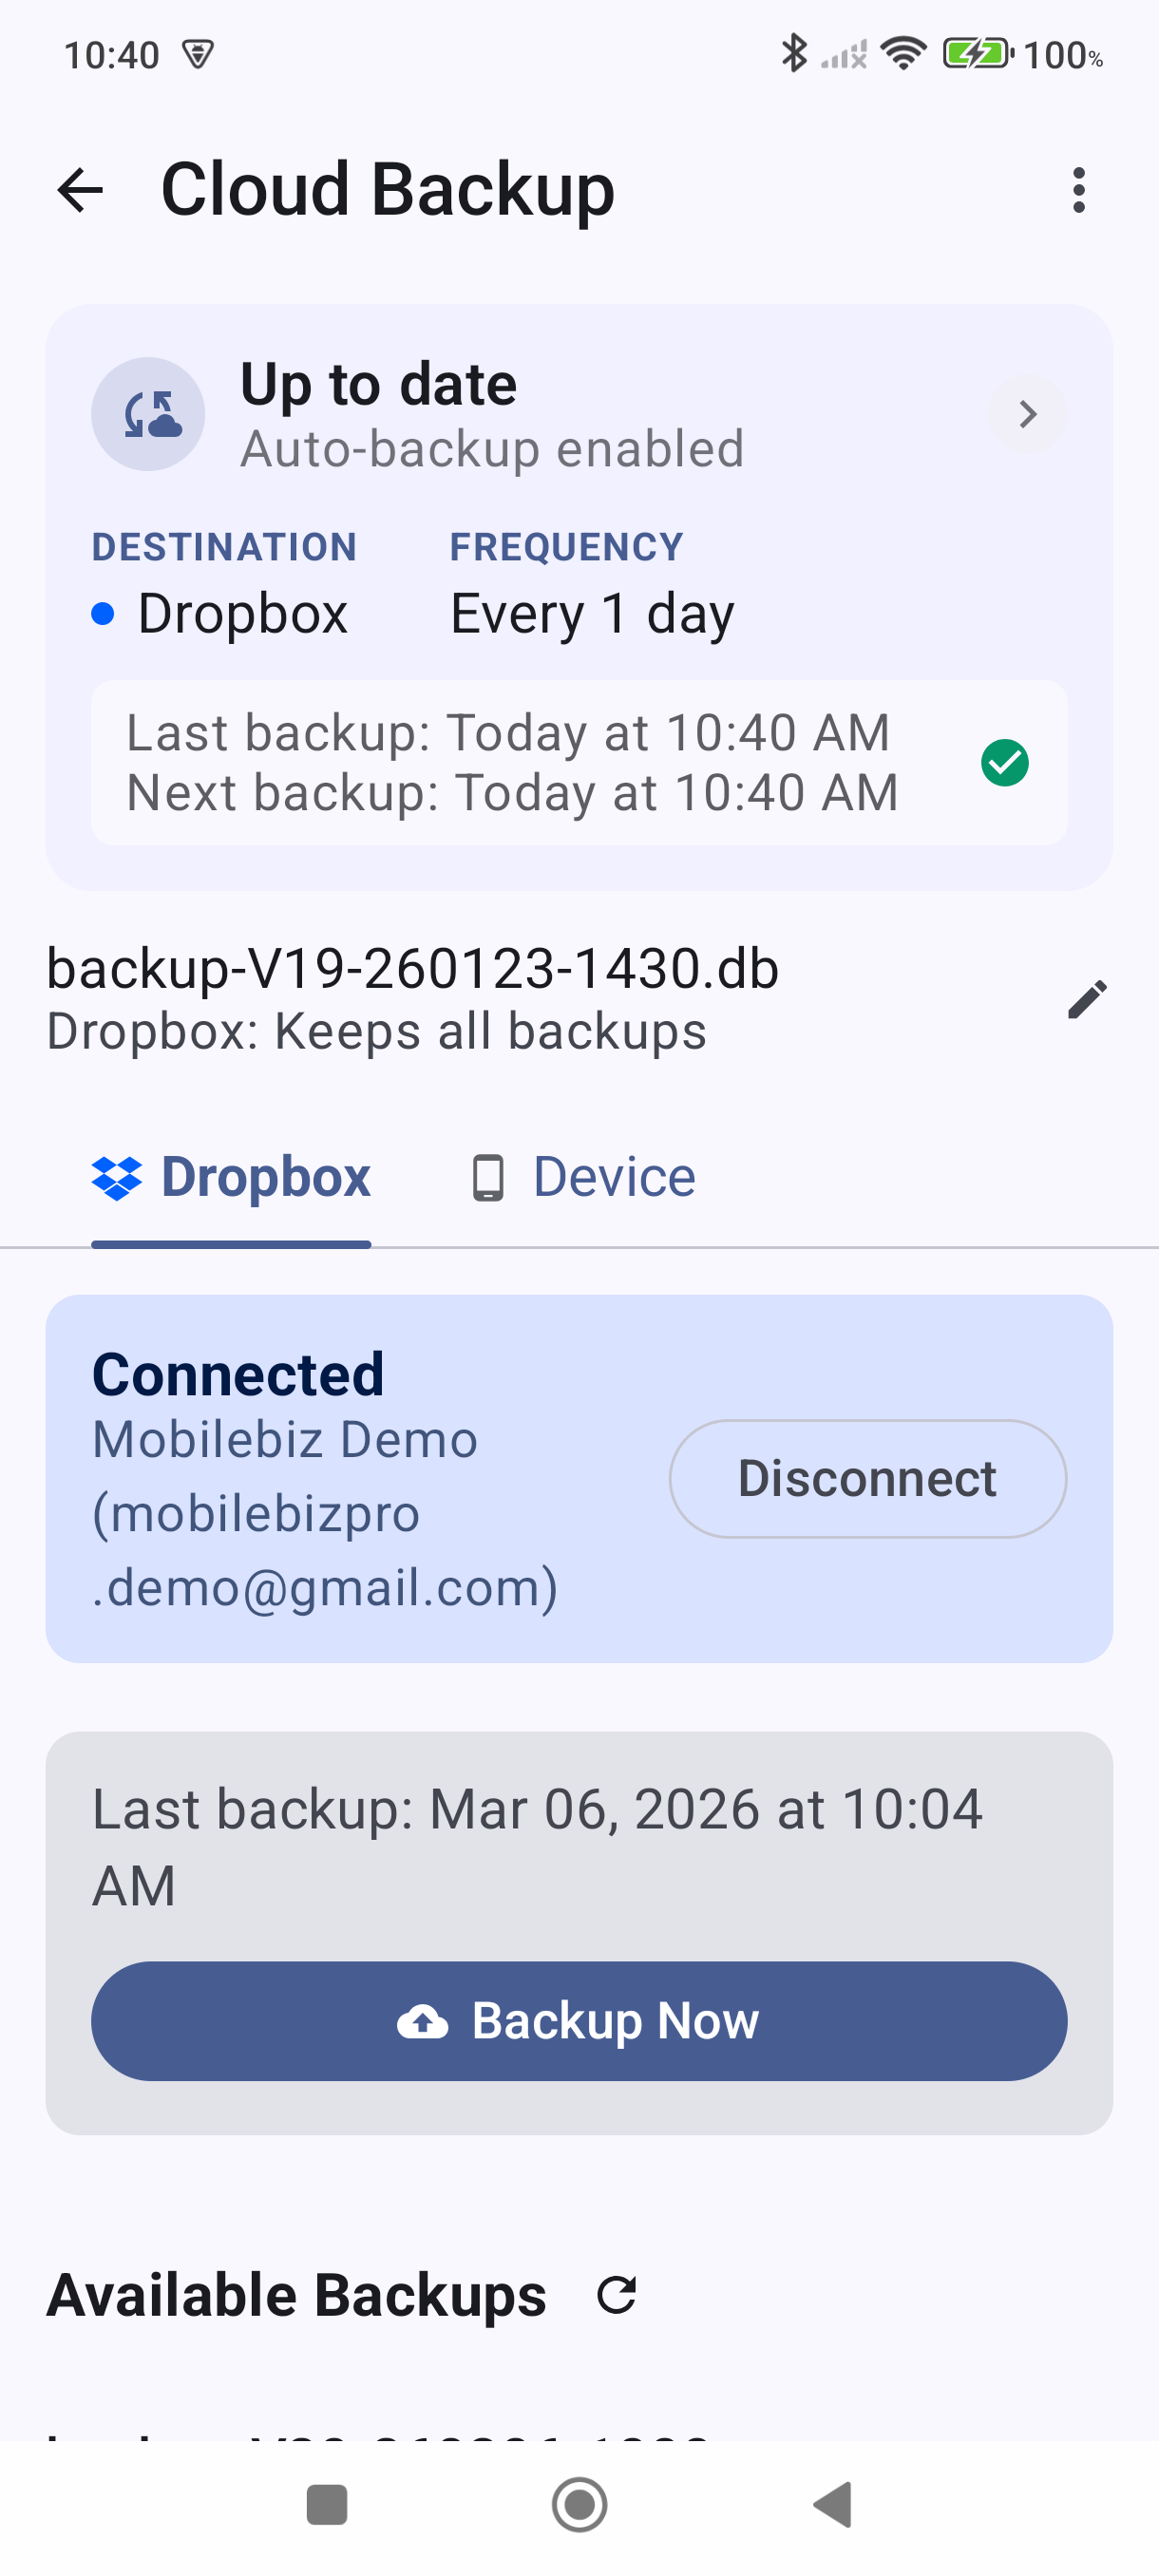
Tap Connect and sign in with your Google account. Grant the permissions the app requests. When the connection succeeds, the card shows "Connected" along with your Google account email.

-
Tap Backup Now. The app uploads your database to Google Drive. A success message appears when it's done.

-
Confirm your backup appears in the Available Backups list below the backup button. You can tap the refresh icon if the list doesn't update immediately.

Set Up Automatic Google Drive Backups
Automatic backup runs on a schedule so you never have to think about it. This requires a Plus subscription and an active Google Drive connection.
-
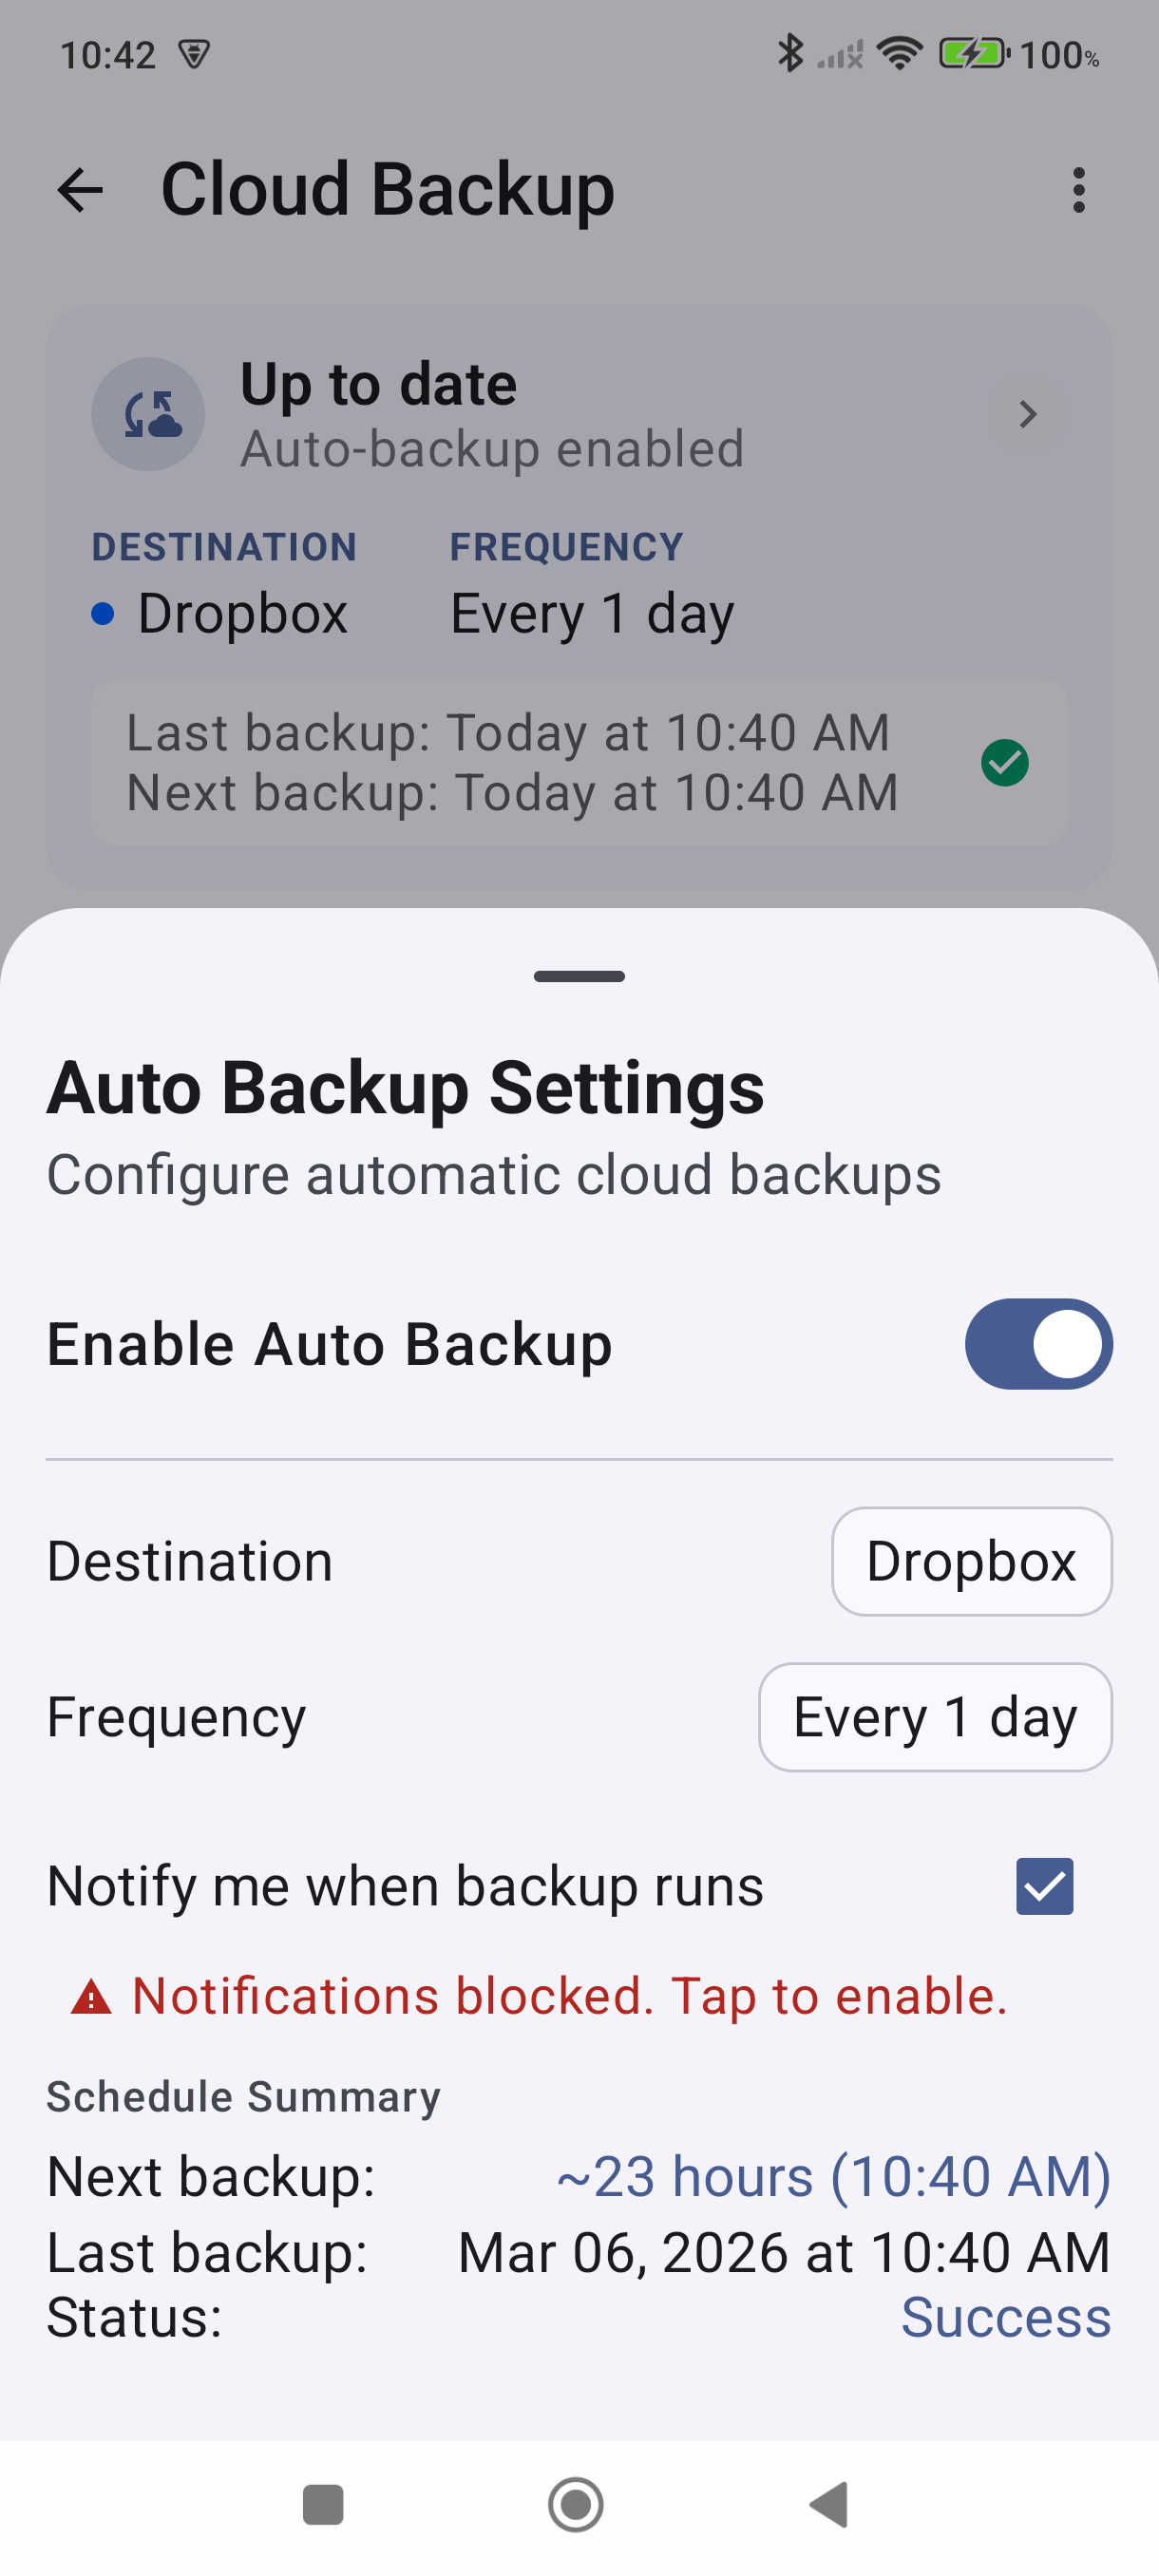
On the Backup & Restore screen, tap the Auto Backup status bar at the top of the screen — it shows "Auto Backup Off" or your current schedule. The Auto Backup Settings sheet opens.
-
Toggle Enable Auto Backup on. Choose Google Drive as the destination and select how often to back up — options range from every 15 minutes up to every 7 days. Optionally check "Notify me when backup runs" to receive a notification each time a backup completes. If Google Drive isn't connected yet, complete steps 1–4 in the section above first.
-
Swipe the sheet down to close it. The status bar updates to show Google Drive as the destination and your chosen frequency. The first automatic backup runs according to your chosen schedule.
Good to Know
- Free users get one Google Drive backup. After that first backup, the tab shows an upgrade prompt. Your existing backup remains accessible for restore — you just can't create new ones without Plus.
- Automatic Google Drive backup requires Plus. Dropbox backup (manual and automatic) is free for all users — a good option if you want hands-off backups without a subscription.
- Plus subscribers can back up manually as many times as they want, and enable automatic backup on any schedule.
- Backups include all companies in your database, not just the active company.
- To restore from a Google Drive backup, tap any backup file in the Available Backups list and confirm. See How to Restore a Backup for full steps.
- If the connection shows "Session Expired," tap Reconnect to re-authenticate with Google.
- You can customize backup filenames and control how many backups are kept using the Backup Options row on the Backup & Restore screen. See How to Set Up Automatic Backups for details on those settings.
- The Auto Backup status bar always shows your last backup time and the next scheduled run when auto-backup is enabled.
Still stuck? Contact Support for help.