When a customer pays, record it against their invoice. The invoice status updates automatically — Partially Paid for a partial amount, Fully Paid once the balance hits zero.
Steps
-
From the Dashboard, tap the New tile in the Shortcuts grid, then tap Accept payment.
-
Pick the customer who is paying from the list that opens. The Accept Payment screen opens with everything they still owe listed underneath.
-
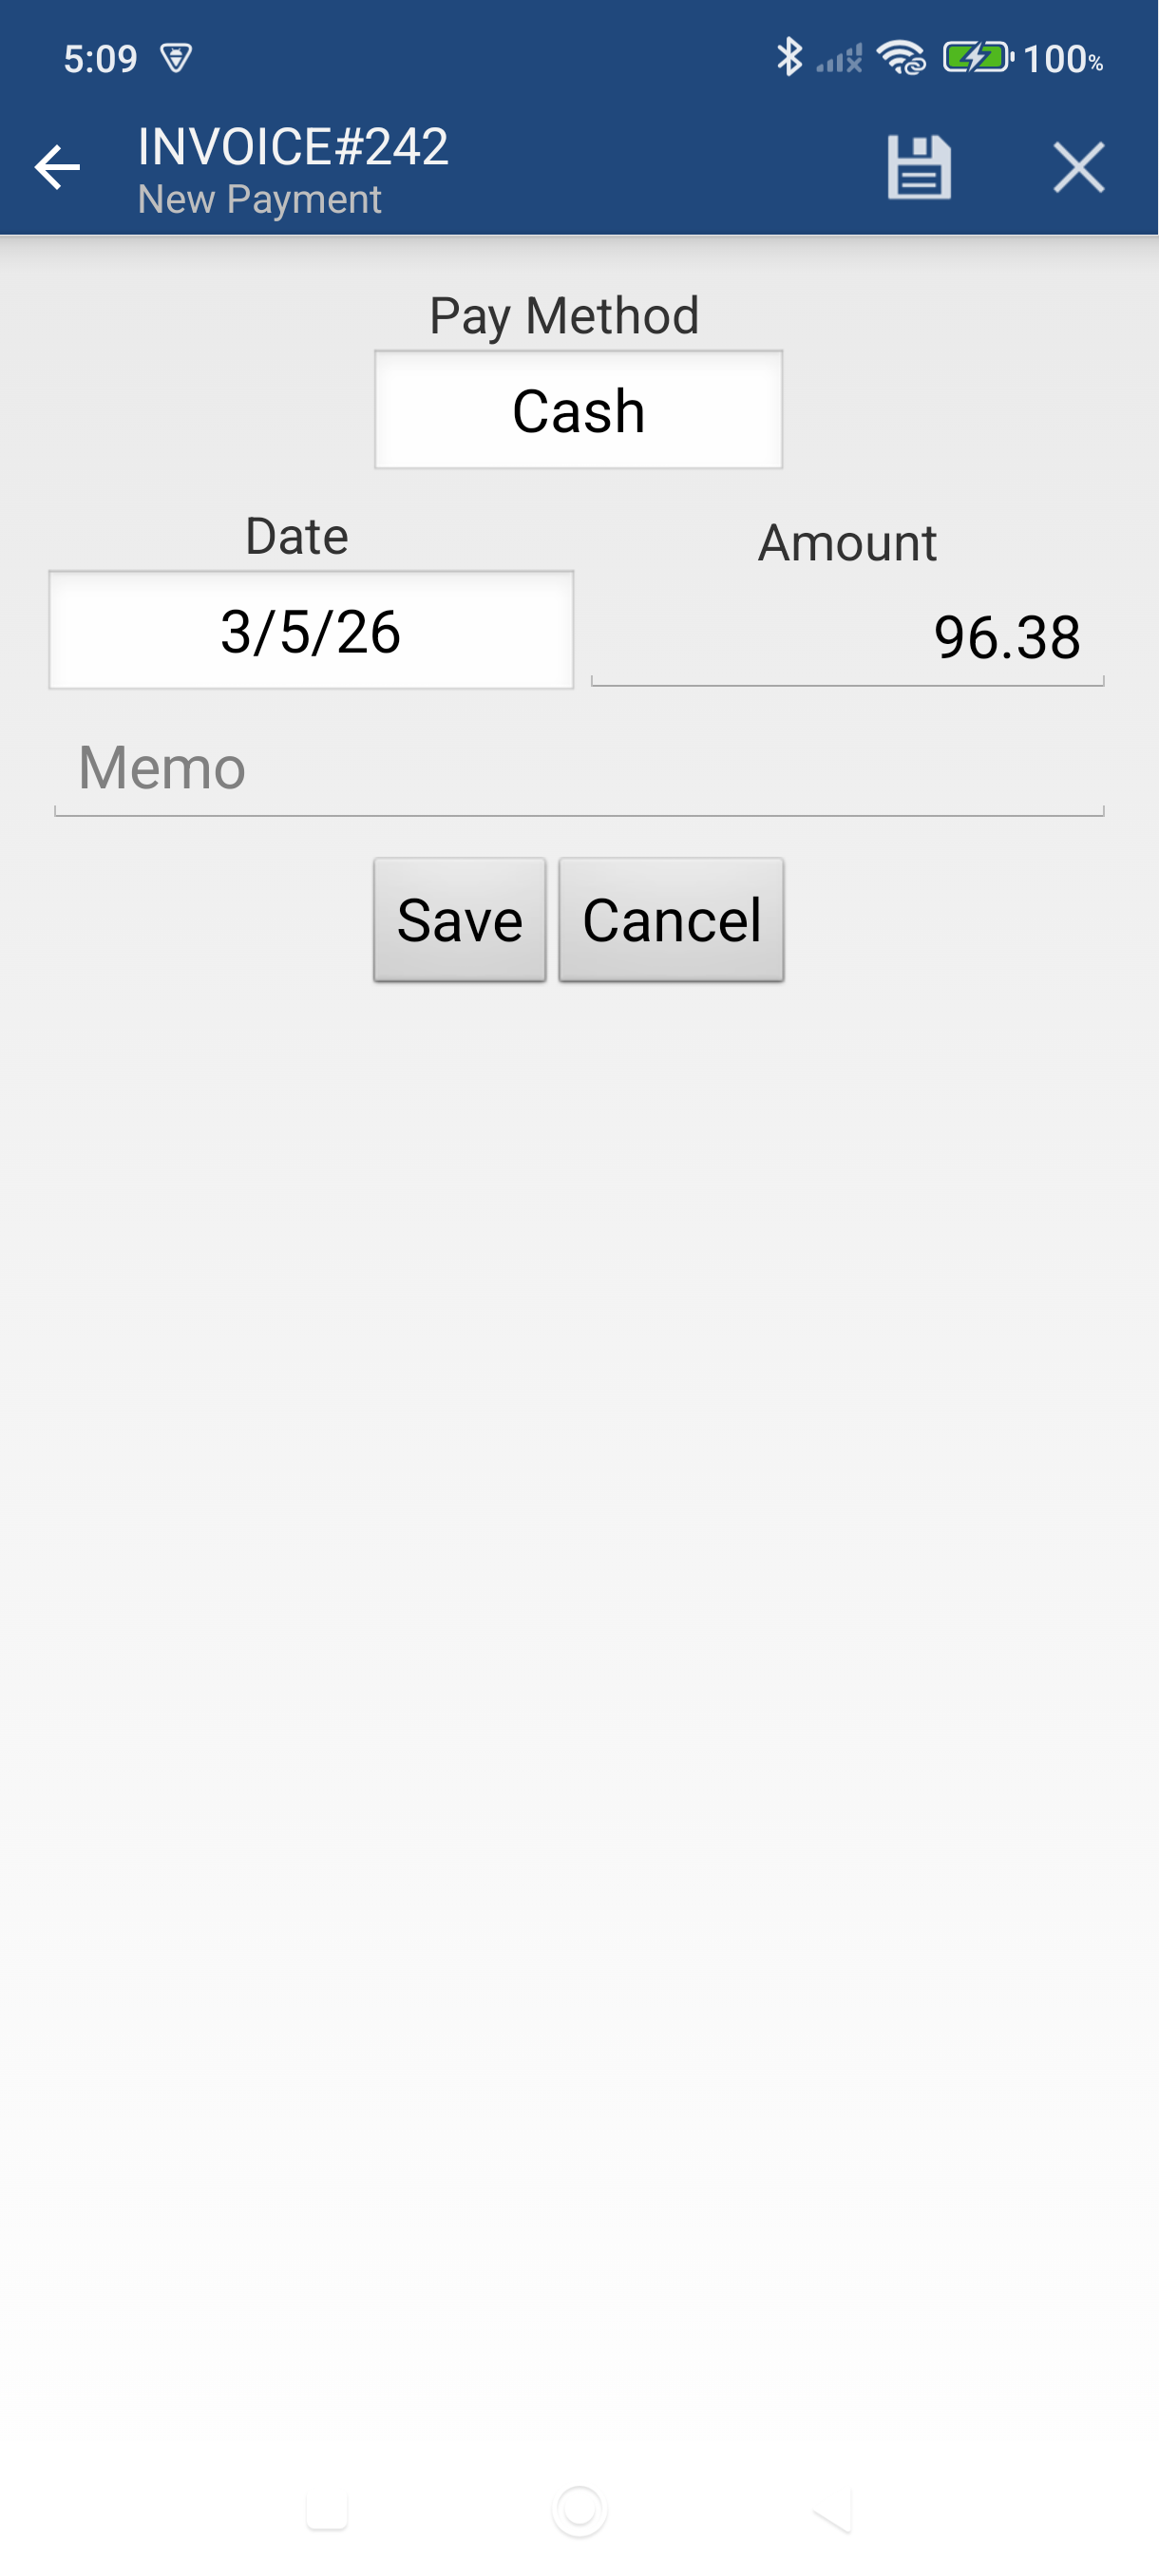
Confirm or change the date — it defaults to today.
-
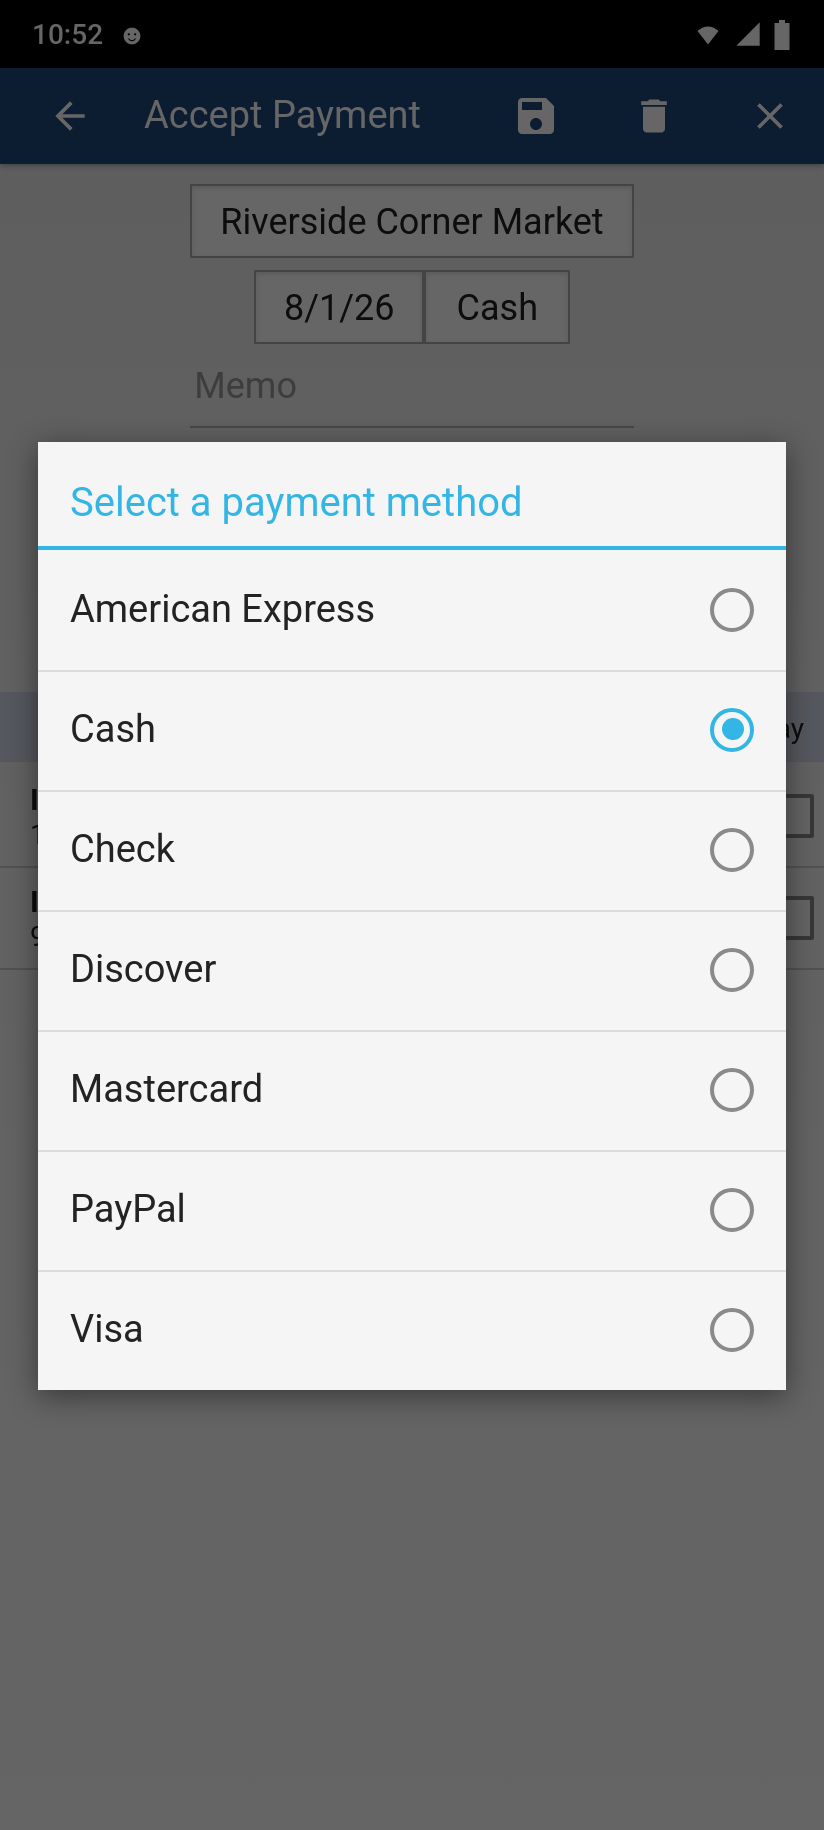
Tap the payment method button next to the date and choose how the customer paid.
-
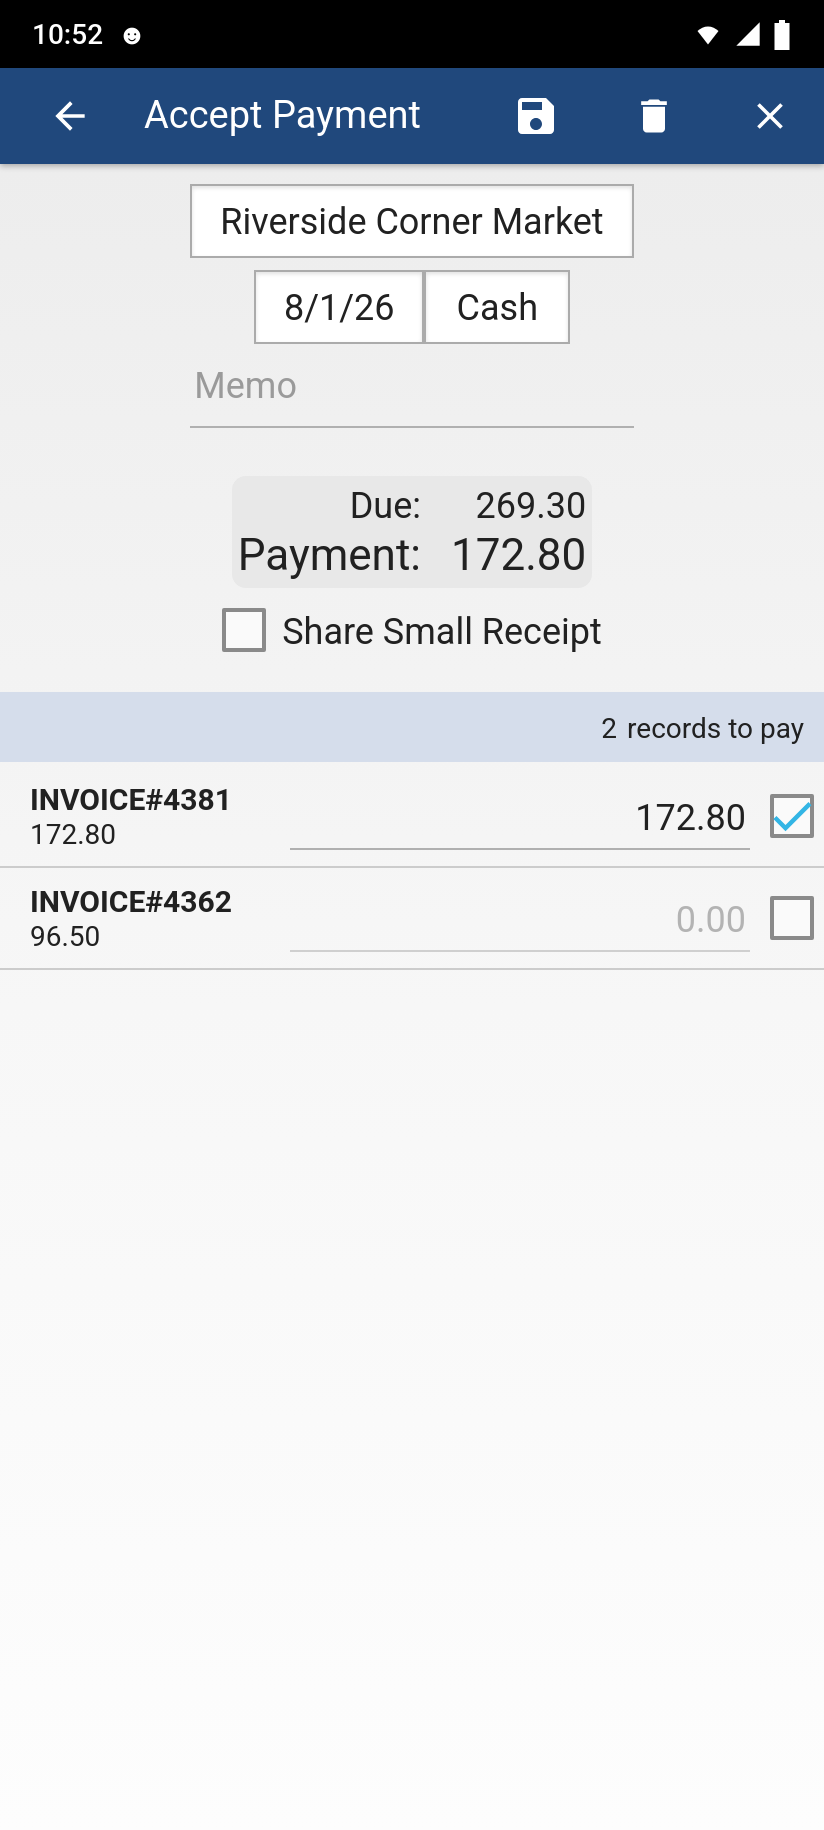
Tick the invoice being paid — its full balance drops into the amount box. Type a smaller figure instead for a partial payment. The Payment total at the top adds up whatever you enter.
-
Tap the Save icon (the floppy disk in the action bar) — the payment is recorded and the app opens the customer's Payments tab.
-
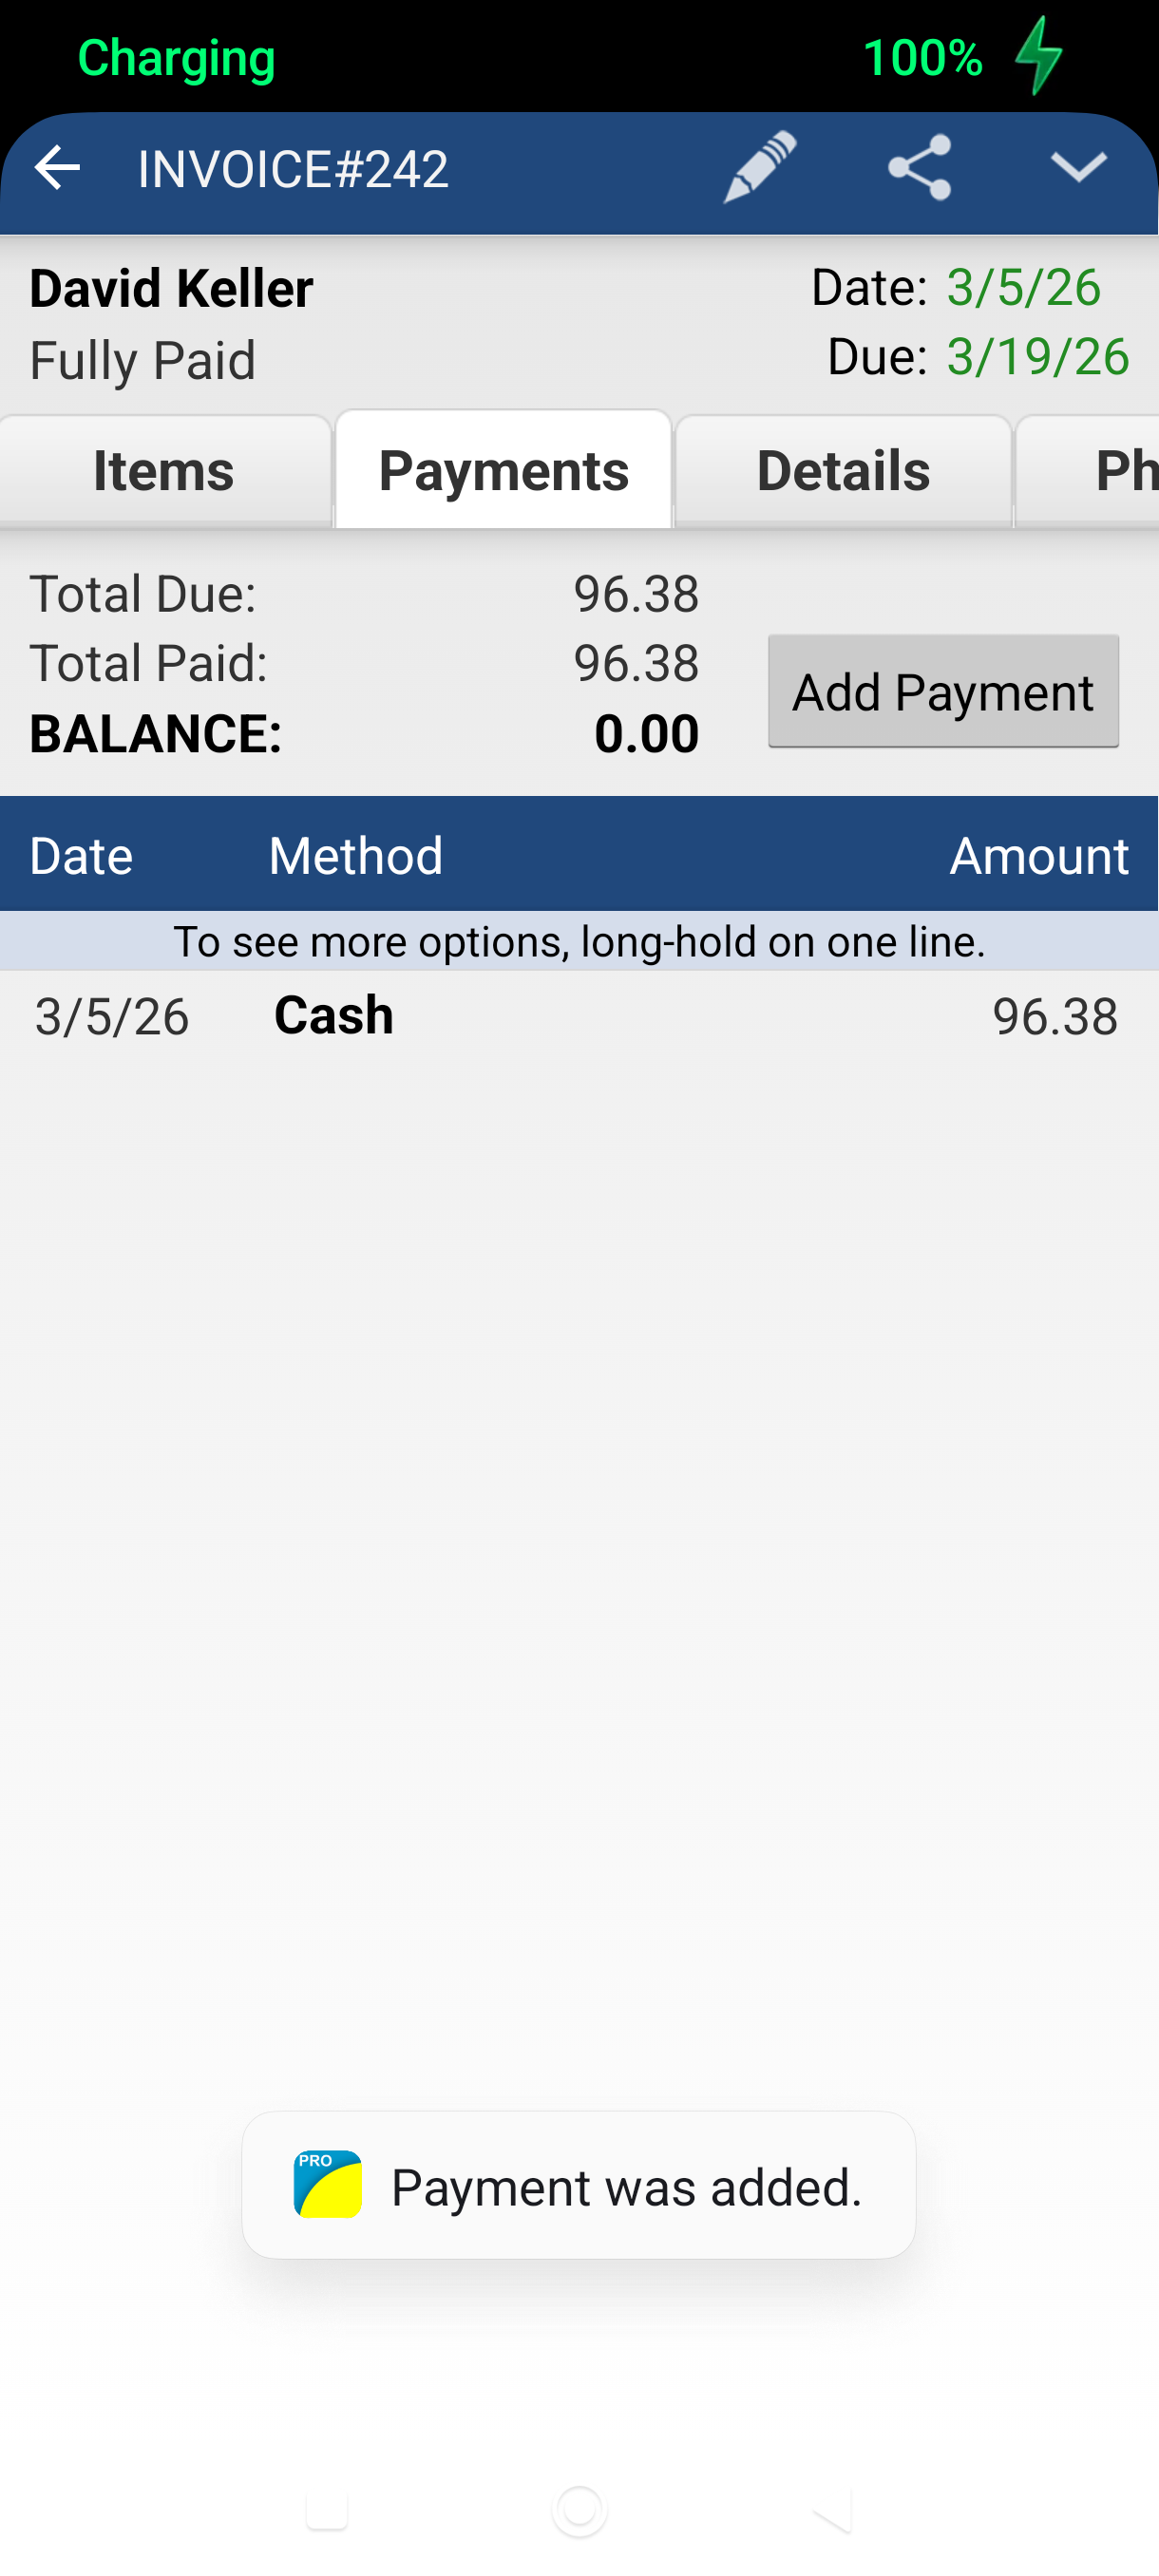
To check the invoice, open it and tap the Payments tab. The balance now reads 0.00 and the status has changed.
Good to Know
- One payment across several invoices. Everything the customer owes is listed on the Accept Payment screen — tick more than one and enter an amount against each to settle them all in a single payment.
- Paying one invoice from the invoice itself. Open the invoice, tap the Payments tab, then tap Add Payment. That opens the New Payment screen, which records a payment against that invoice only.
- Partial payments. Enter less than the balance. The invoice moves to Partially Paid and the rest stays on the Payments tab.
- Edit or delete a payment. Long-hold a payment row on the Payments tab to edit, email, print, or delete it.
- Running a delivery route or selling from a van? See Take the Order at the Stop.
Still stuck? Contact Support for help.