There are two kinds of "extra info" you might want on an invoice PDF, and each has its own tool:
- The same on every invoice (bank details, a standard note, terms) — edit the template.
- Different on each invoice (a PO number, job site, vehicle VIN) — add a custom field.
This article covers both.
Same-on-Every-Invoice: Edit the Template
The template controls the layout and fixed text of every PDF for a document type.
-
Open the invoice you just saved (or a quote, cash sale, or sales order). This is the invoice screen the app lands on after a save — the one with Send, Mark paid, Add item and Preview along the bottom.
-
Tap Preview in that bottom bar — the Preview screen shows the document exactly as it will print. It opens on the Full page tab; the Receipt tab beside it shows the thermal-receipt version.
-
Tap Customize at the bottom to open the template editor.
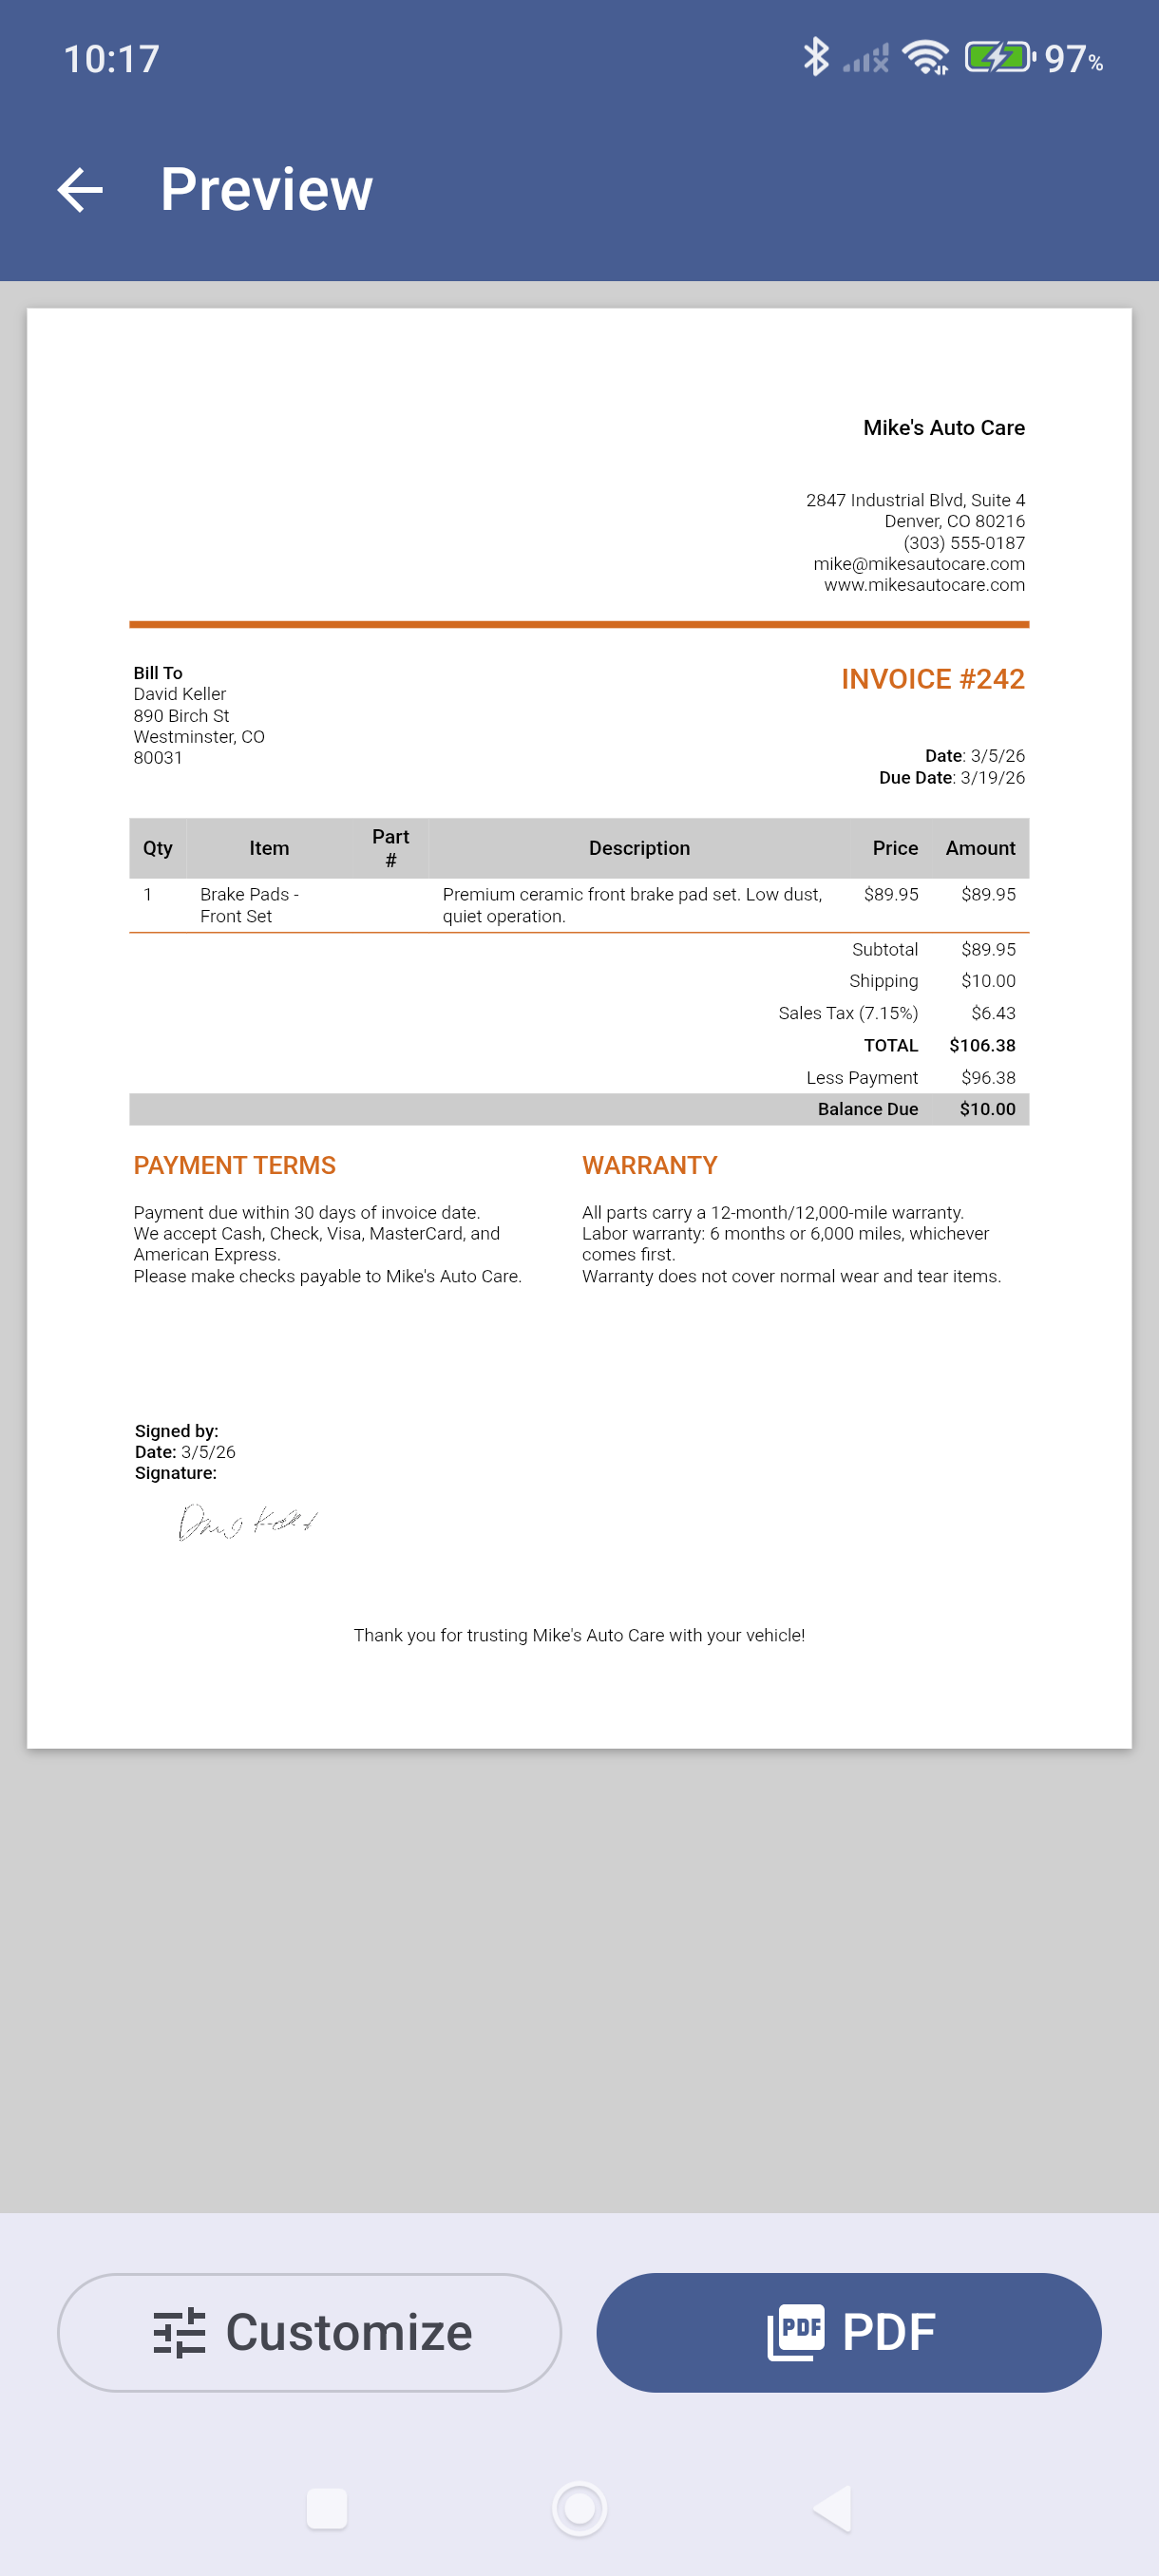
Inside the editor, tap any section to expand it, then tap the Preview (eye) icon to see changes and Save (disk) to keep them. Sections that hold extra text include:
- Notes to Customer — a free-text note block on the document.
- Additional Info — a Payment Details block and an Other Info block.
- Footer — text at the bottom of every page.
For the full list of sections, see What Can I Customize on My Invoice?.
Different-on-Each-Invoice: Add a Custom Field
A transaction body field adds an extra box to the invoice screen so you can type a different value on each invoice — then show it on the PDF.
Before you start: decide what you want to track (e.g., "PO Number") and which document types should have it.
-
Go to Settings > Lists & customization > Custom fields.
-
Tap Transaction body fields, then tap Add (the + button).
-
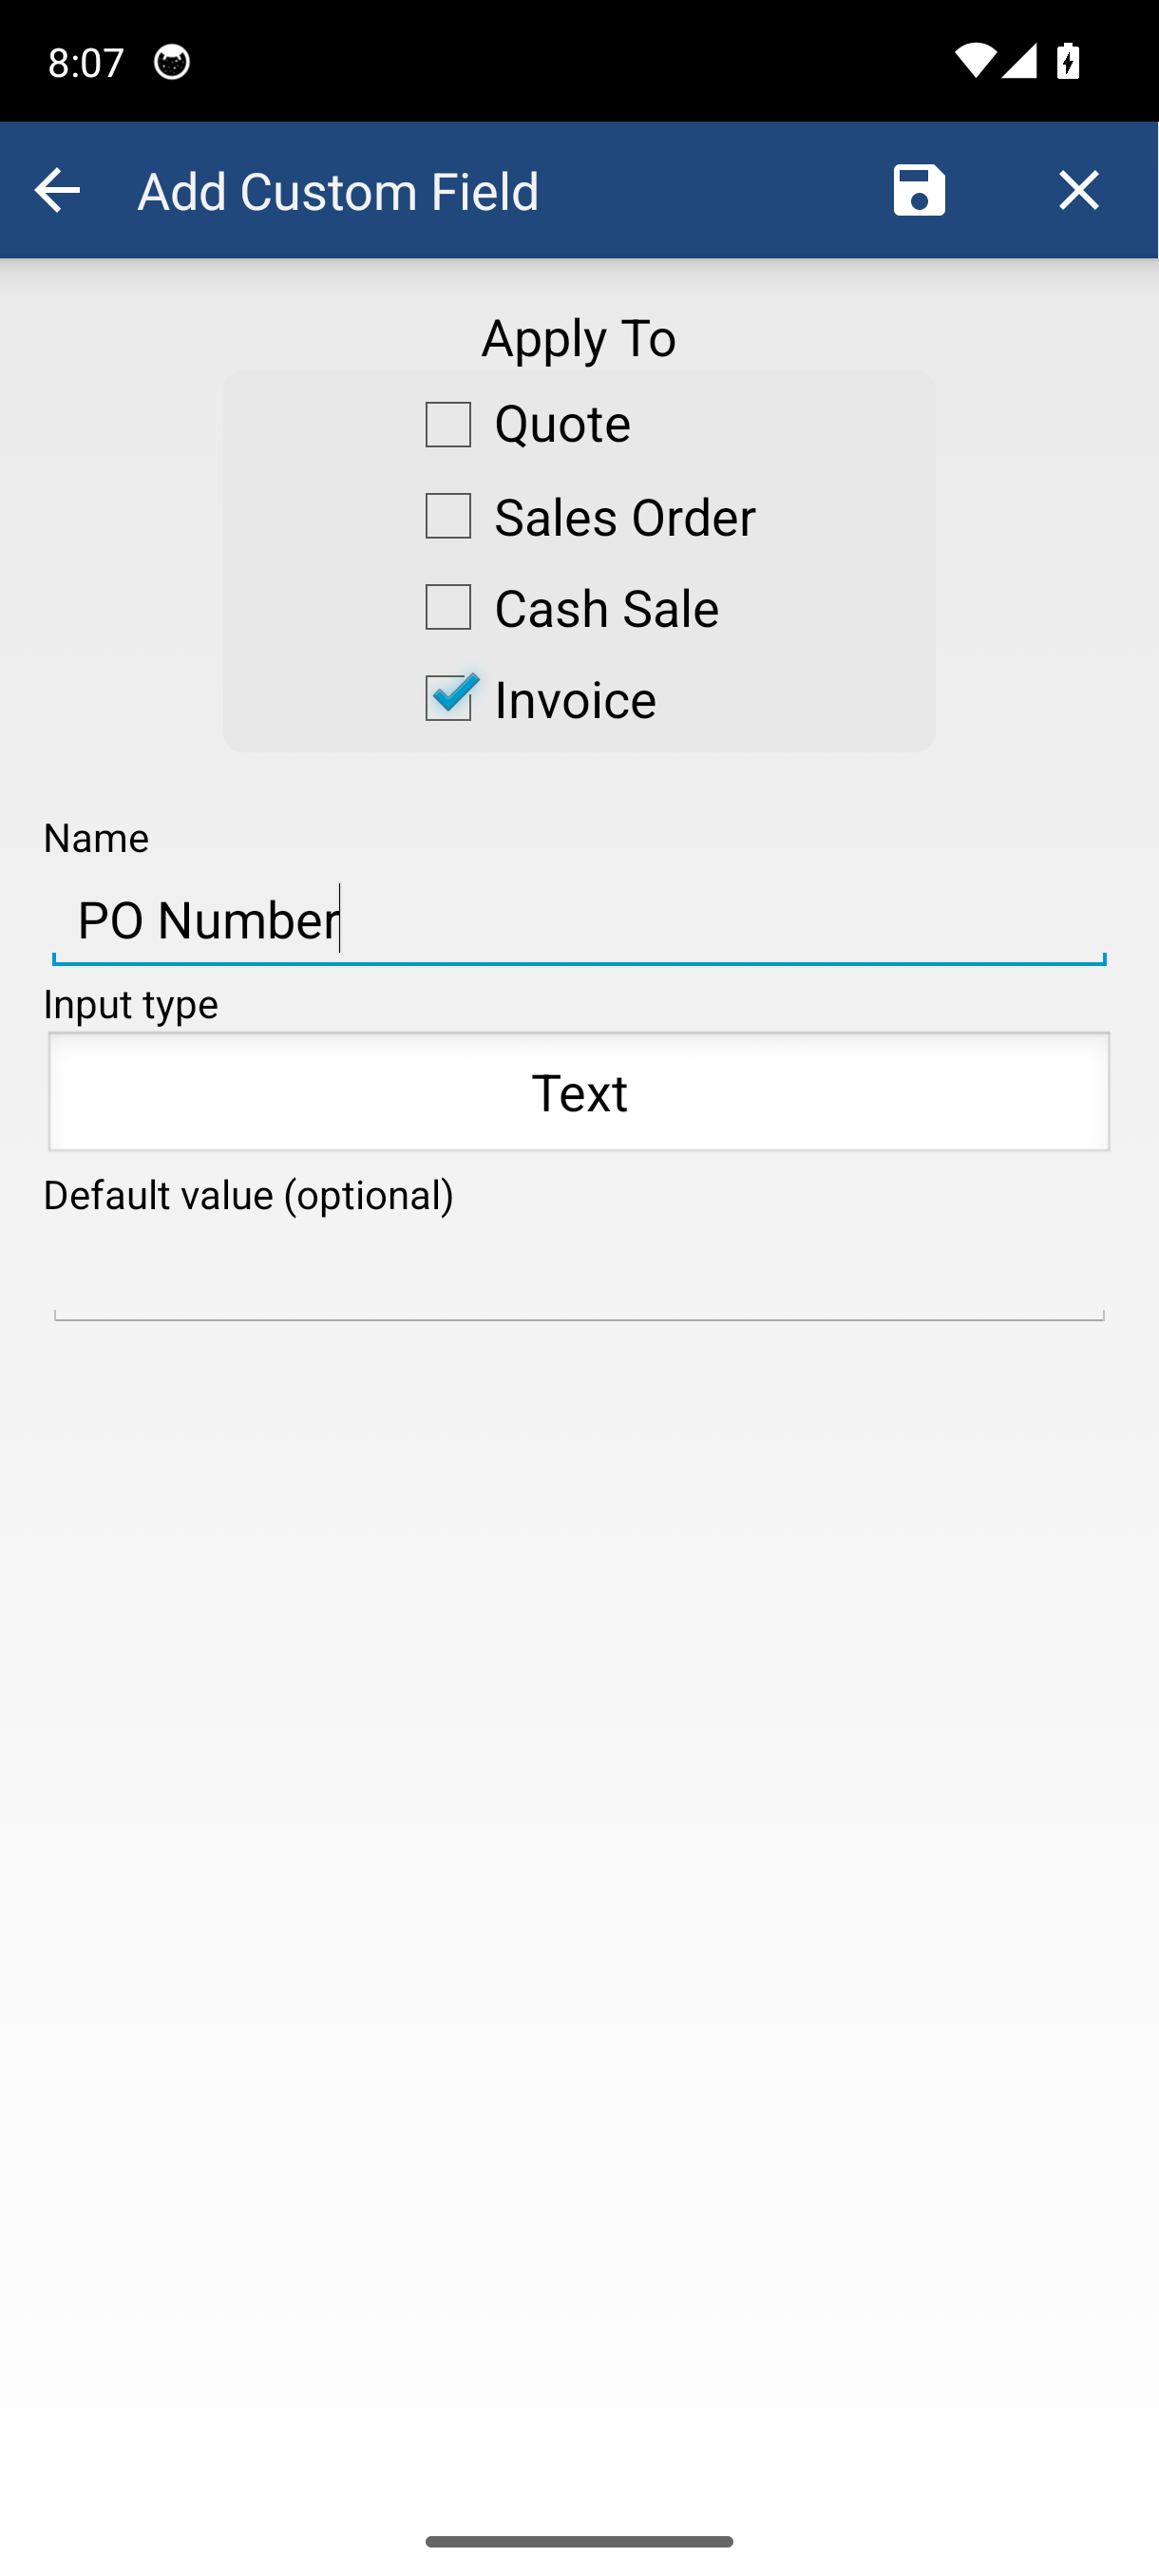
Under Apply To, tick the document types — Quote (your estimates), Sales Order, Cash Sale, or Invoice. Enter a Name, pick an Input type (Text, Number, Date, Checkbox, Barcode, and more), then tap the Save (floppy disk) icon in the action bar.
-
Open an invoice — your new field now appears on the edit screen. Type a value for that invoice.
-
Show it on the PDF: back in the template editor, open the section where you want the value to appear and tap Tags. Tap your custom field's tag to copy it, then paste it into the field. Its value prints for each invoice.
Customize Each Document Type Separately
Customizations are saved per document type — so changing the invoice does not change your quote or cash sale.
- At the top of the template editor, tap the document-type pill (e.g., Invoice) to switch to Estimate, Sales Order, or Cash Sale, then customize that type.
- Each section shows a scope hint: "Shown on Invoice only." means the change affects only the current type, while "Shown on every document." means it applies to all types at once.
Good to Know
- Custom fields work on more than invoices. You can also add fields to customers and items, and surface those on the PDF the same way — via the Tags button.
- No Customize button on your preview? You've opened the quick preview. Go back to the invoice screen that carries the bottom Send / Mark paid / Add item / Preview bar and tap Preview there.
- Everything saves per company. Each company you manage keeps its own template and fields.
- Photos can appear on the PDF too — see Add Photos to Your Invoice.
- Assigning a project? See Show Project Details on Your Invoice PDF.
Still stuck? Contact Support for help.