Have your customer sign directly on the screen — the signature is saved to the invoice and printed on the PDF automatically.
What You'll Need
Before you start: Signature capture must be enabled in Settings. Go to the navigation menu > TOOLS > Settings > Features > Signatures and turn on Enable signature. You only need to do this once.
Steps
-
Open the invoice you want the customer to sign.
-
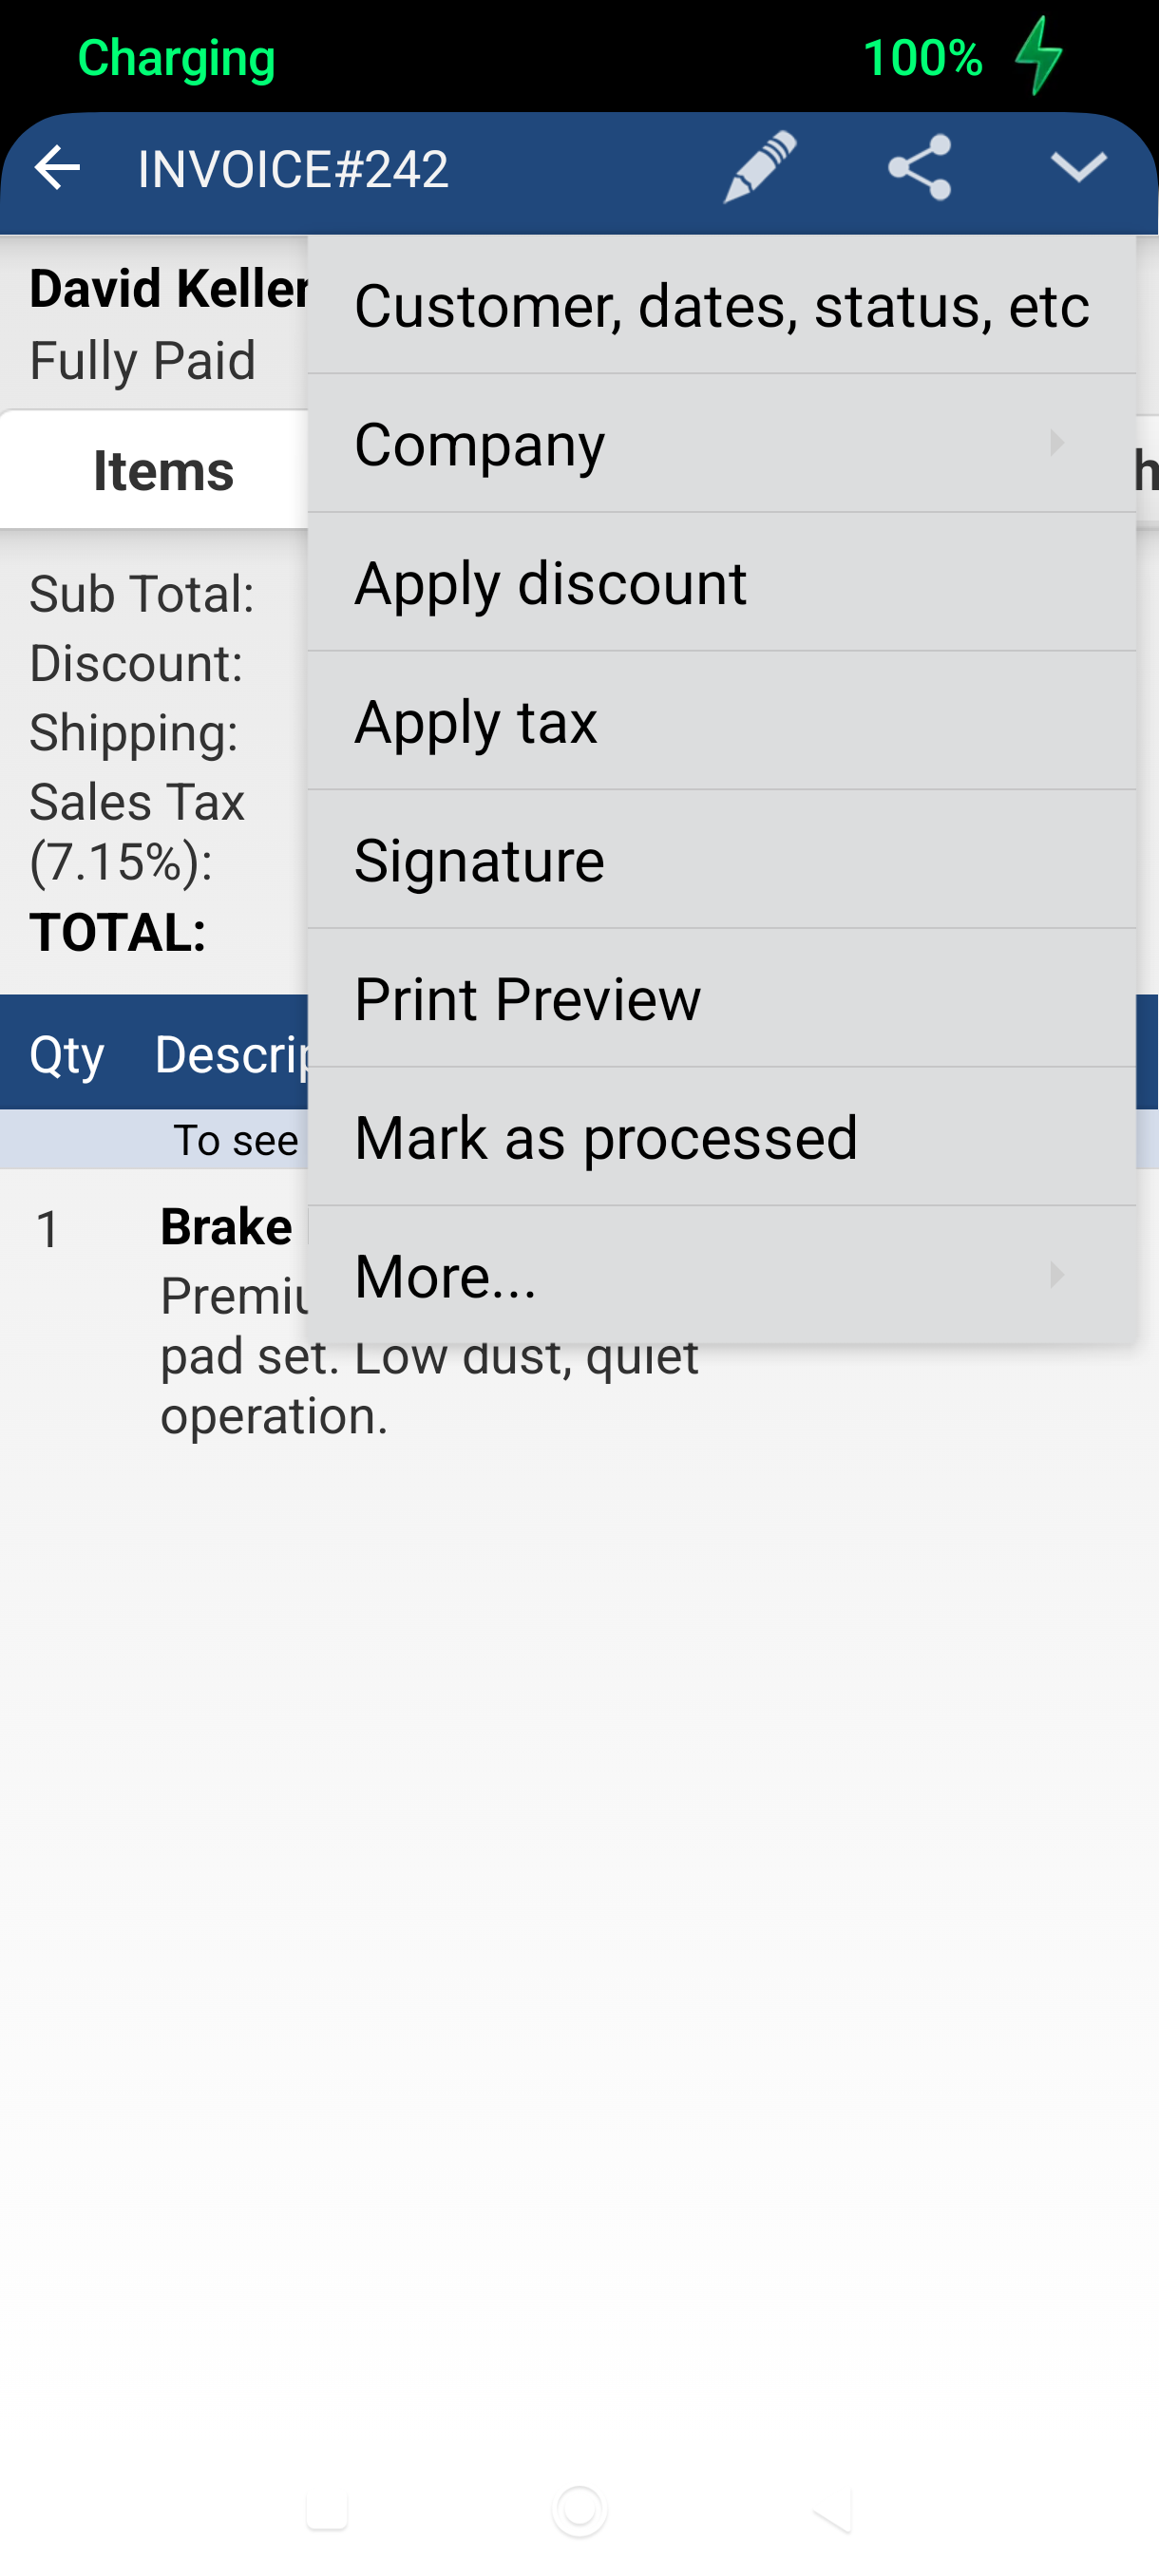
Tap the Edit icon (pencil) in the action bar — the Edit menu appears.
-
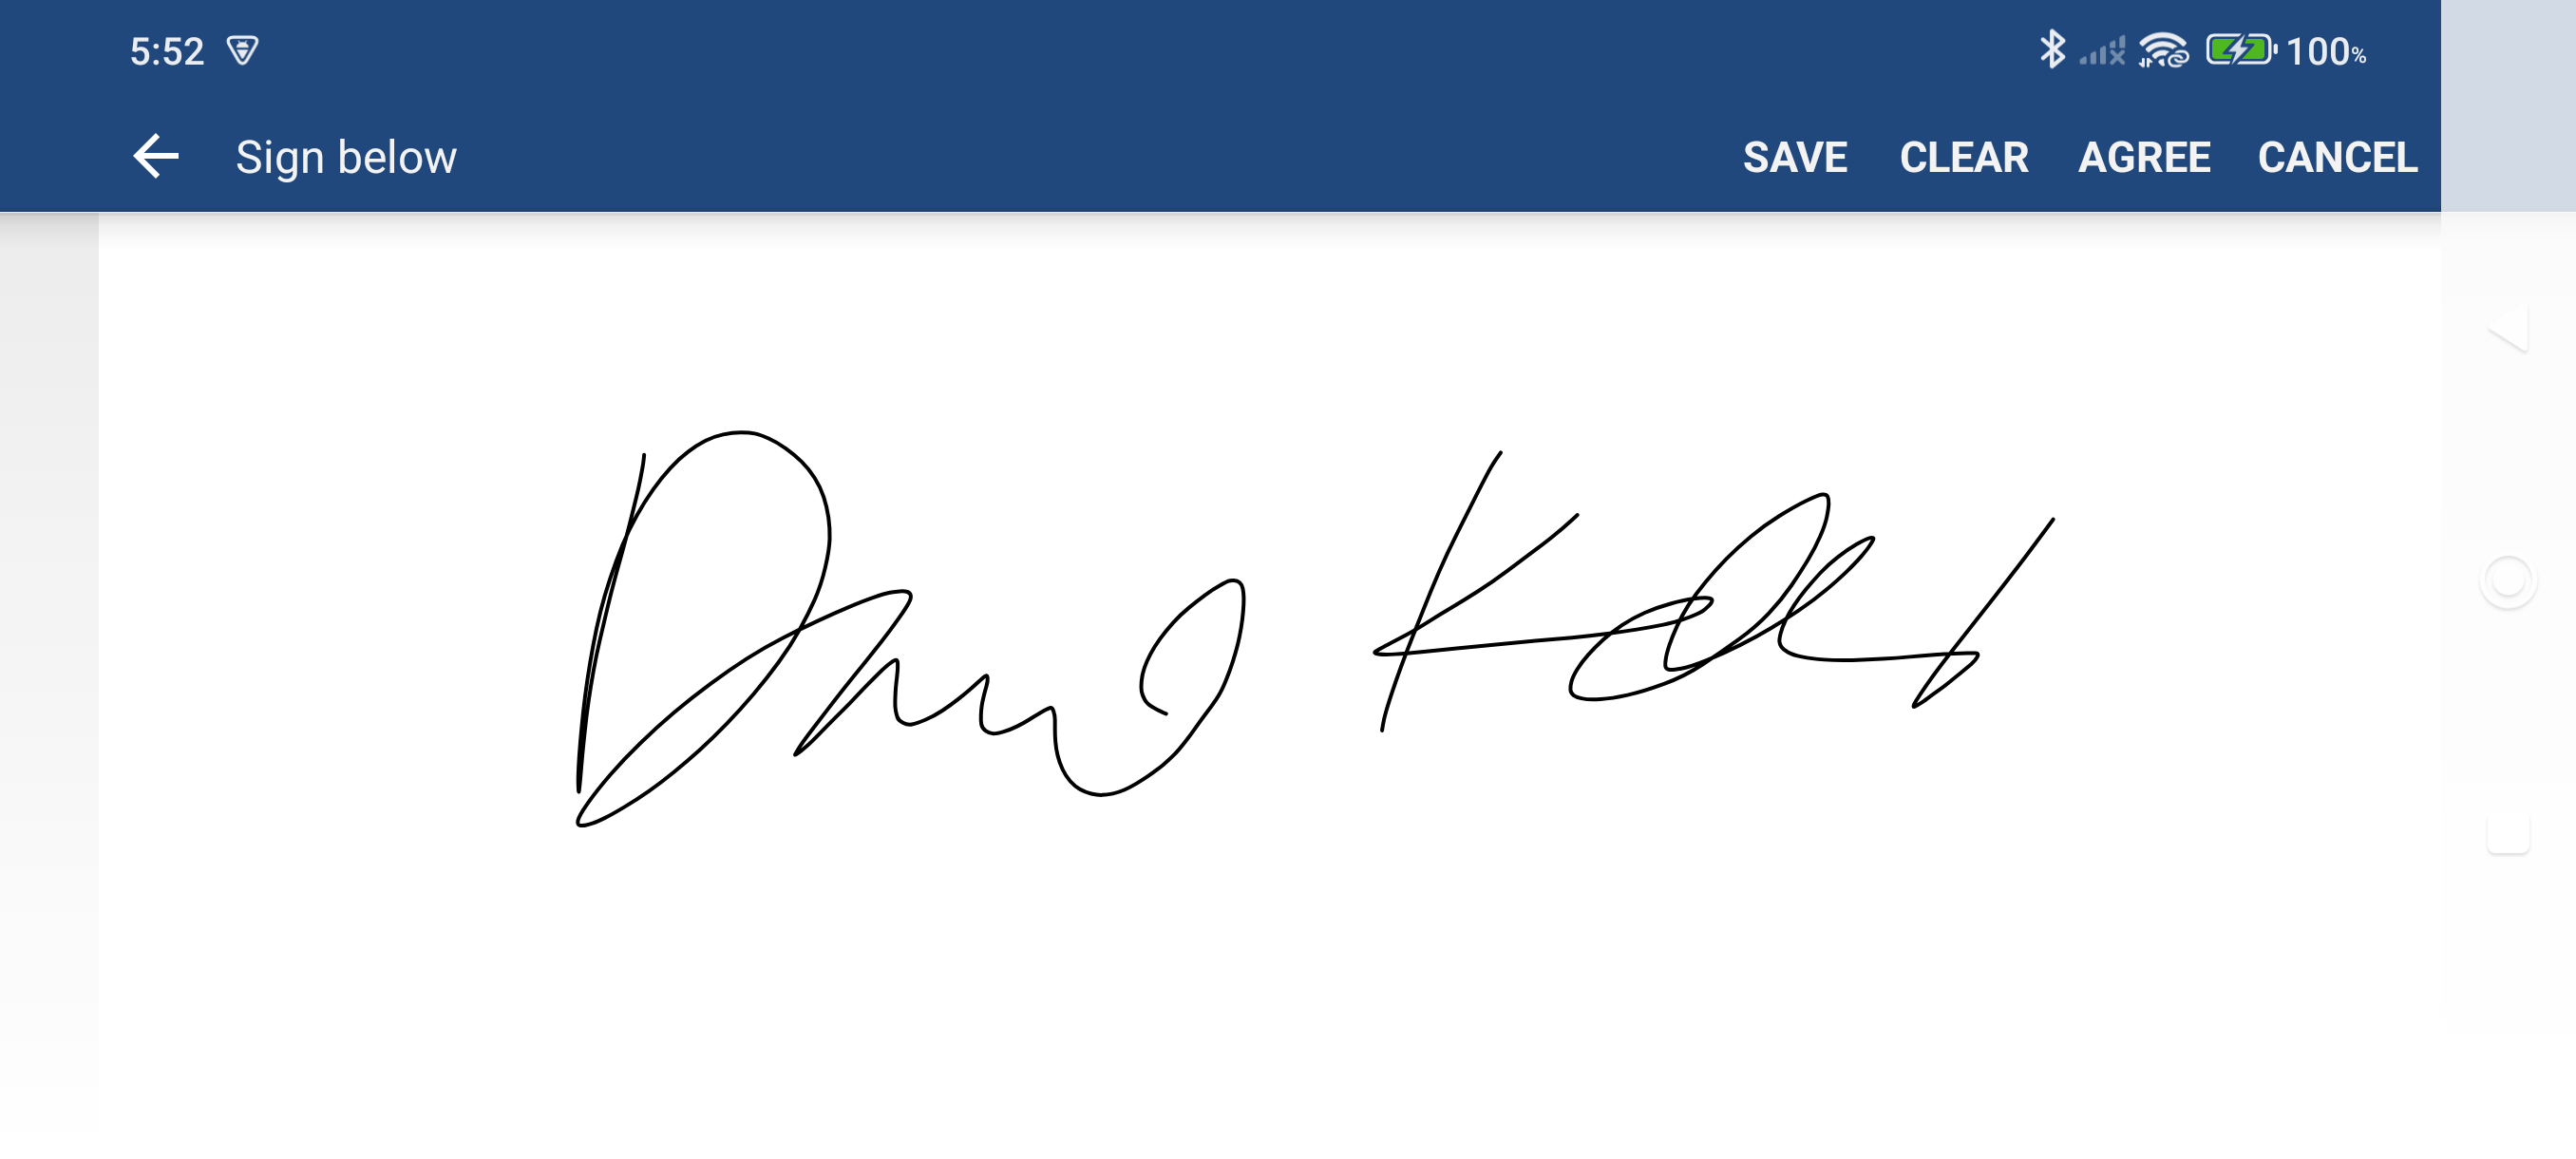
Tap Signature — the signature screen opens with a white drawing canvas.
-
Hand the device to your customer and have them draw their signature on the white canvas with their finger.
-
Tap Save — the signature is attached to the invoice immediately.
-
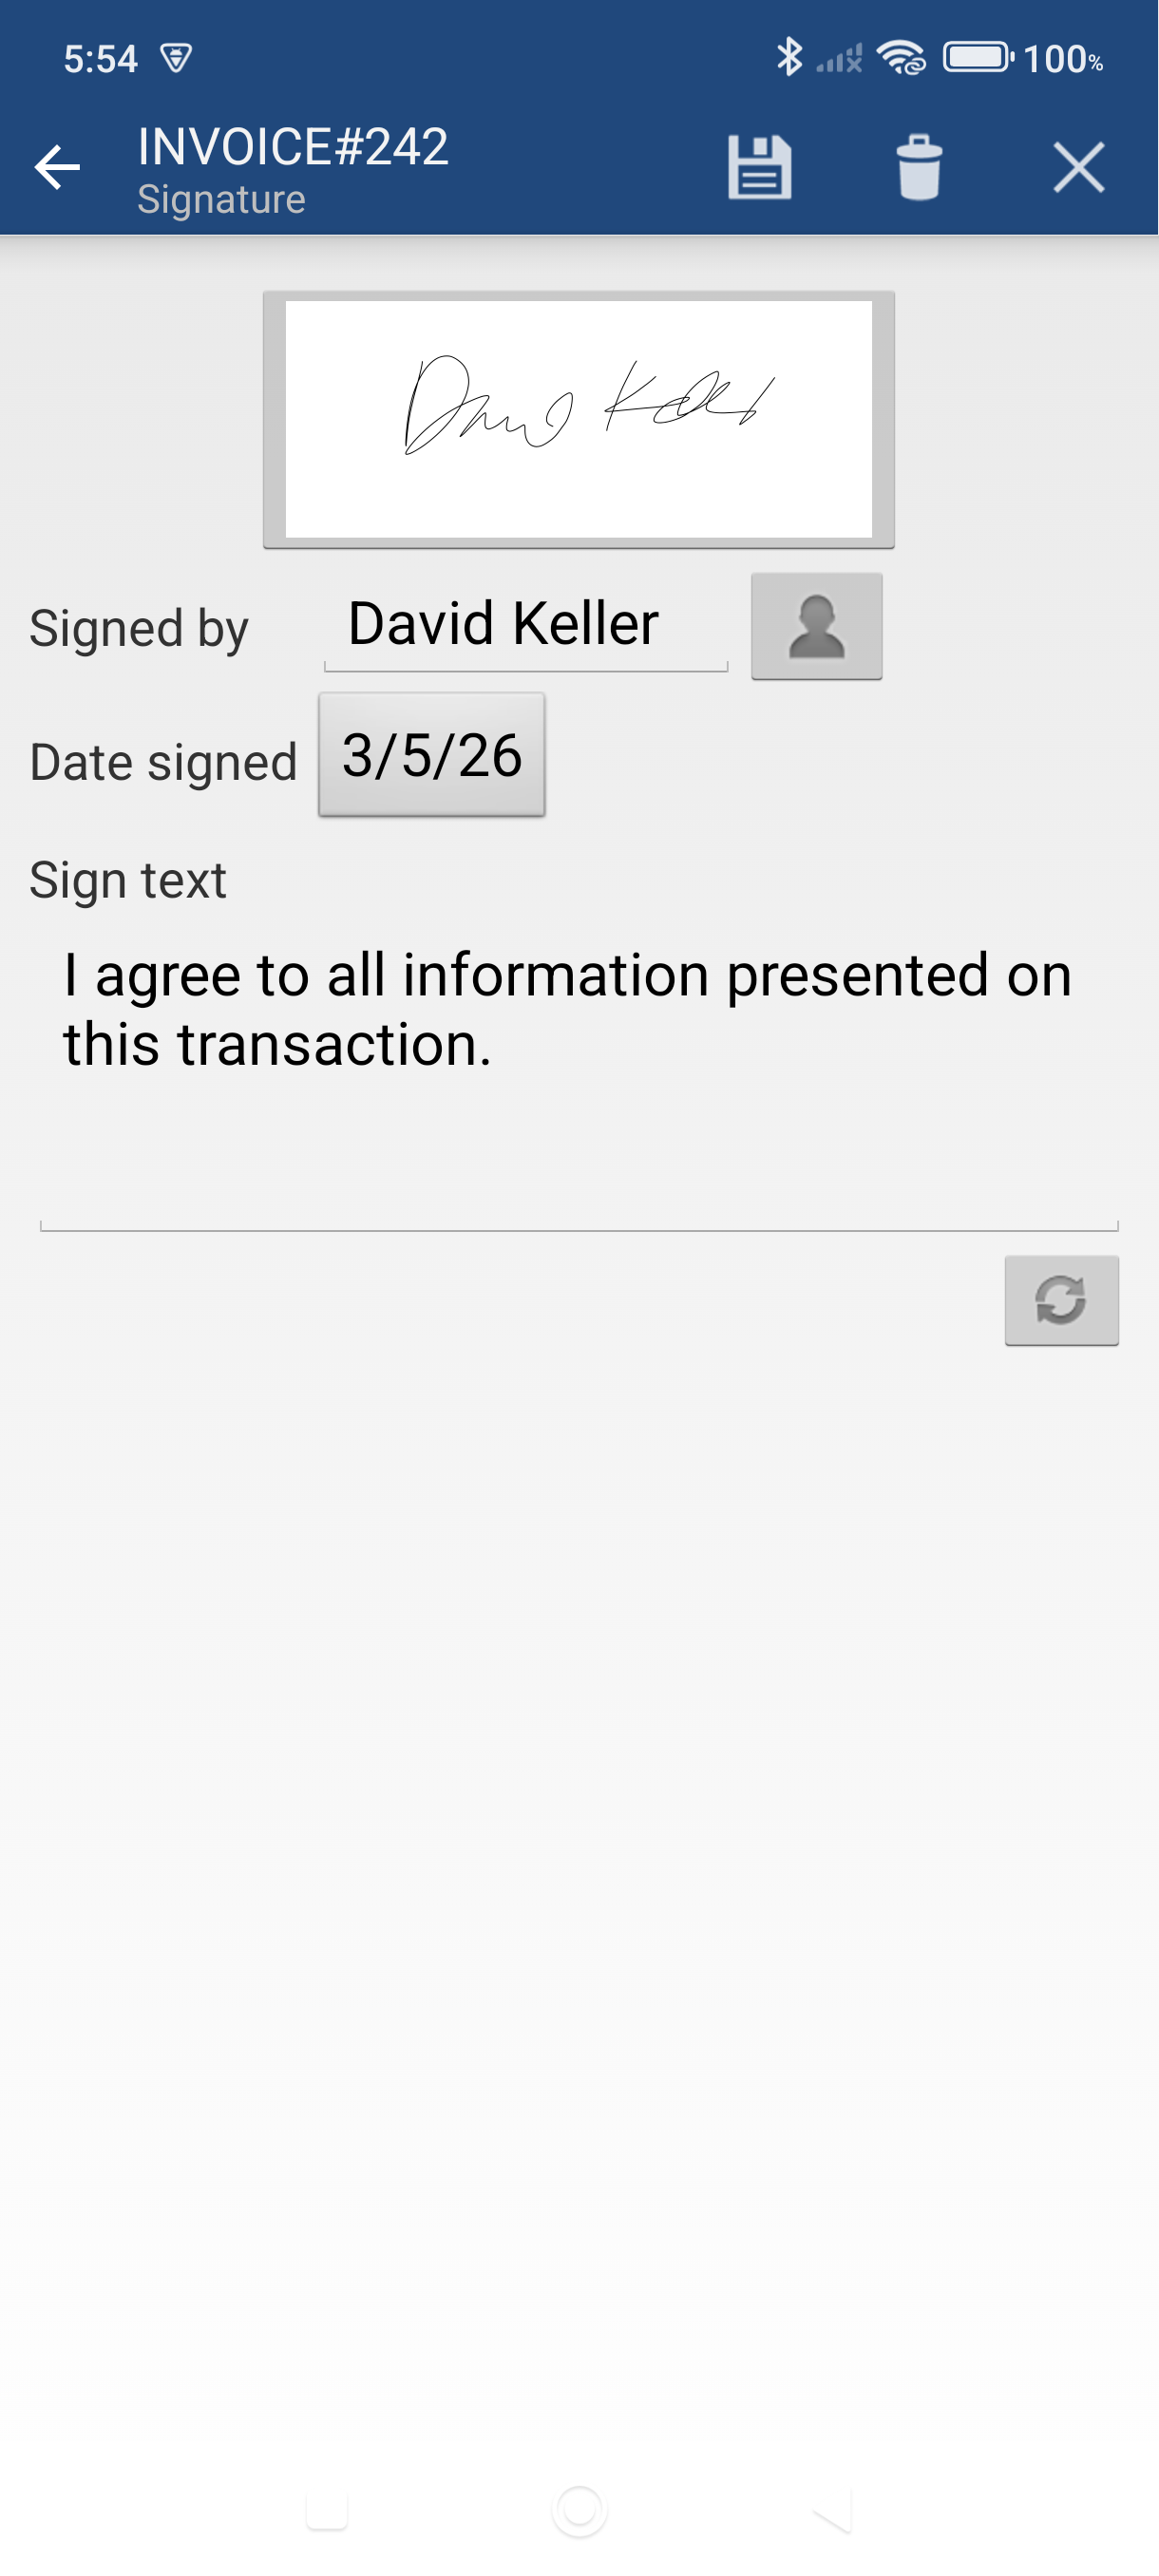
To verify it was saved, tap the Details tab on the invoice — the signature image, date signed, and "Signed by" field appear in the signature section.
Good to Know
- Redo a signature. Open the Edit menu > Signature again, tap Clear to erase the current signature, then have the customer sign again.
- Signature on PDFs. The signature appears on all PDF and print output for this invoice. Its size is configured in Settings.
- Agree text. Tap the Agree button on the signature screen to show your configured agreement text to the customer before they sign.
- Signatures work on all transaction types: invoices, quotes, sales orders, and cash sales.
Still stuck? Contact Support for help.