A quote (also called an estimate) lets you send pricing to a customer before committing to an invoice. When they accept, you can convert it to an invoice in one tap.
What You'll Need
Before you start: Make sure you've added at least one customer and one item or service. See How to Add a Customer and How to Add an Item if needed.
Steps
-
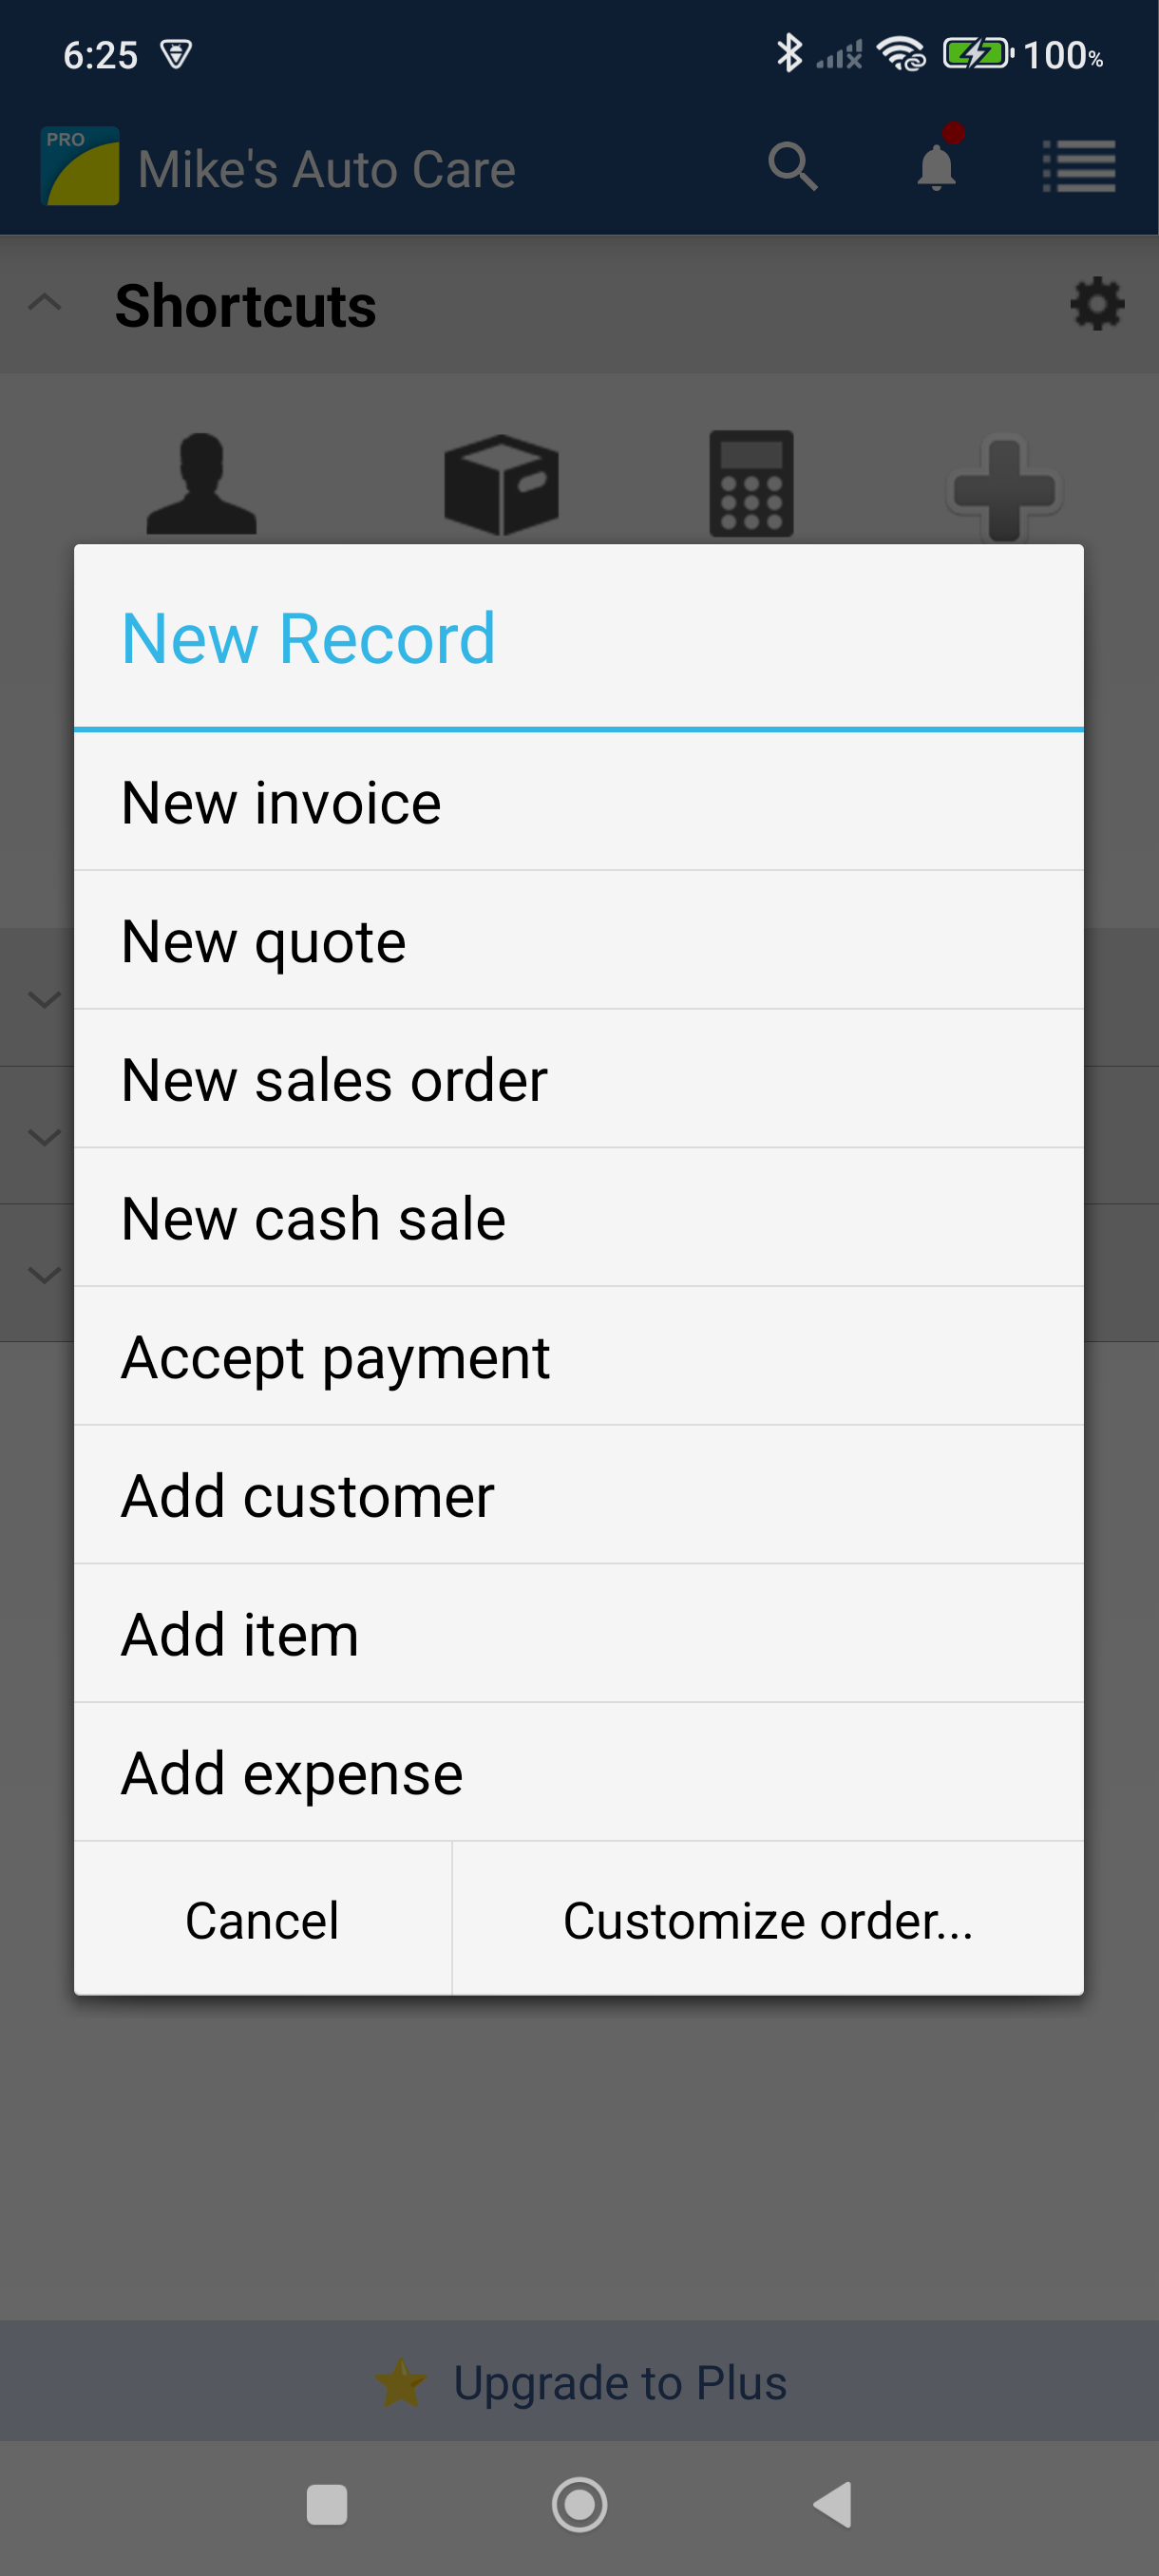
From the Dashboard, tap the + (New) button at the bottom of the screen.
-
Tap New quote — the quote header screen opens.
-
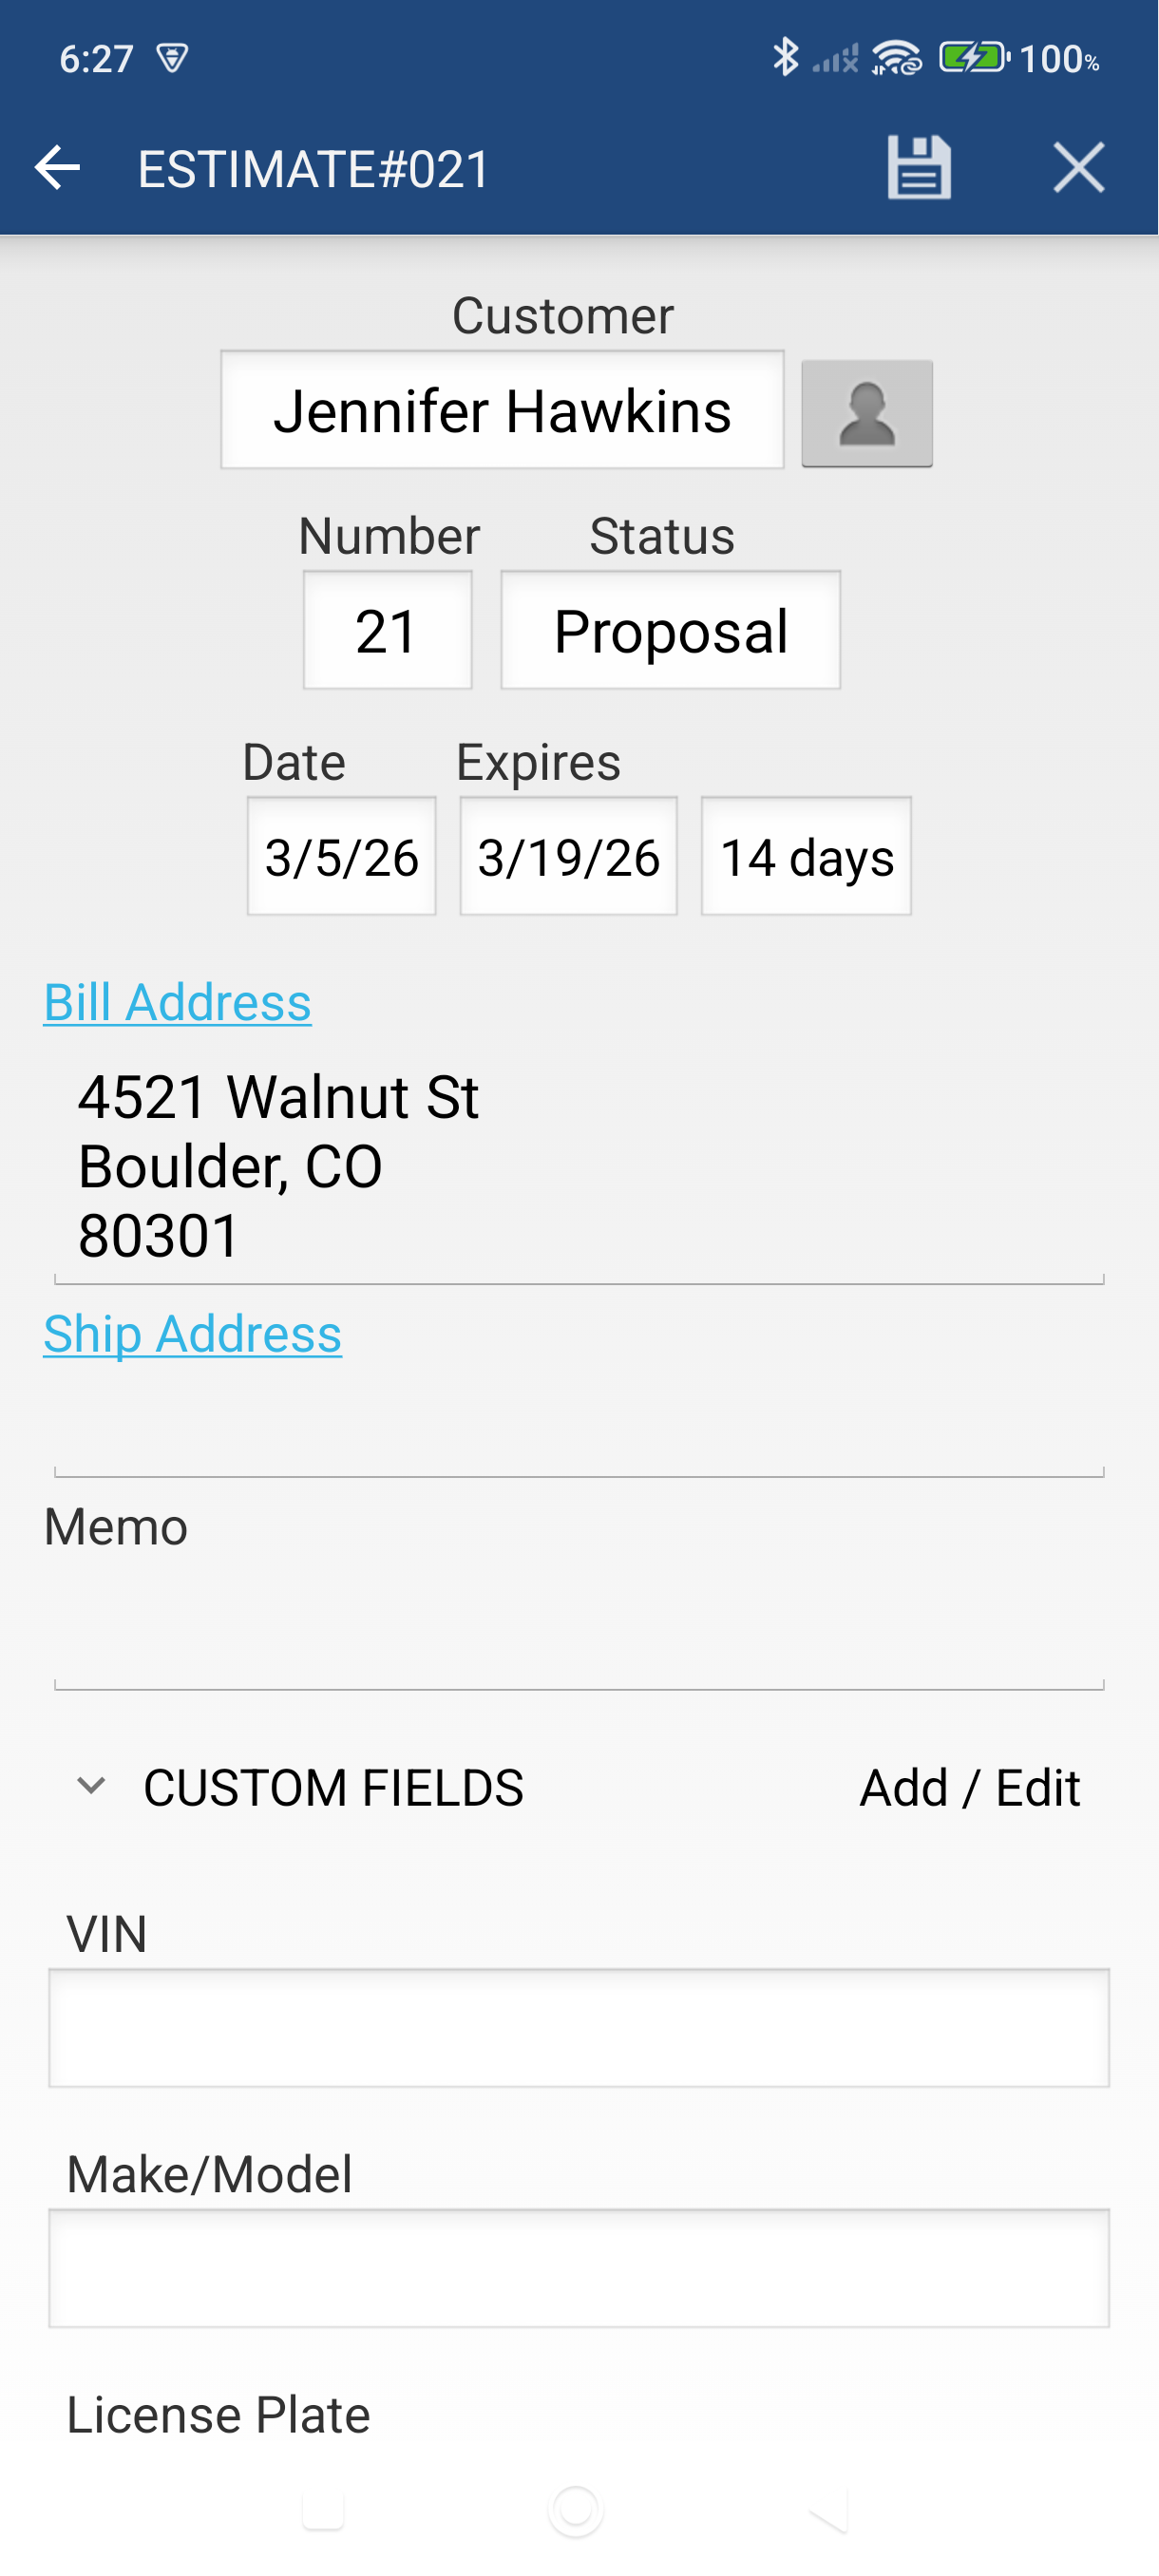
Tap the Customer field and select your customer. Their billing address and payment terms fill in automatically.
-
Set the Expires date — this is the date your pricing offer expires. Tap the field to pick a date.
-
Tap Save (the checkmark icon) — the app creates the quote and opens the quote view screen.
-
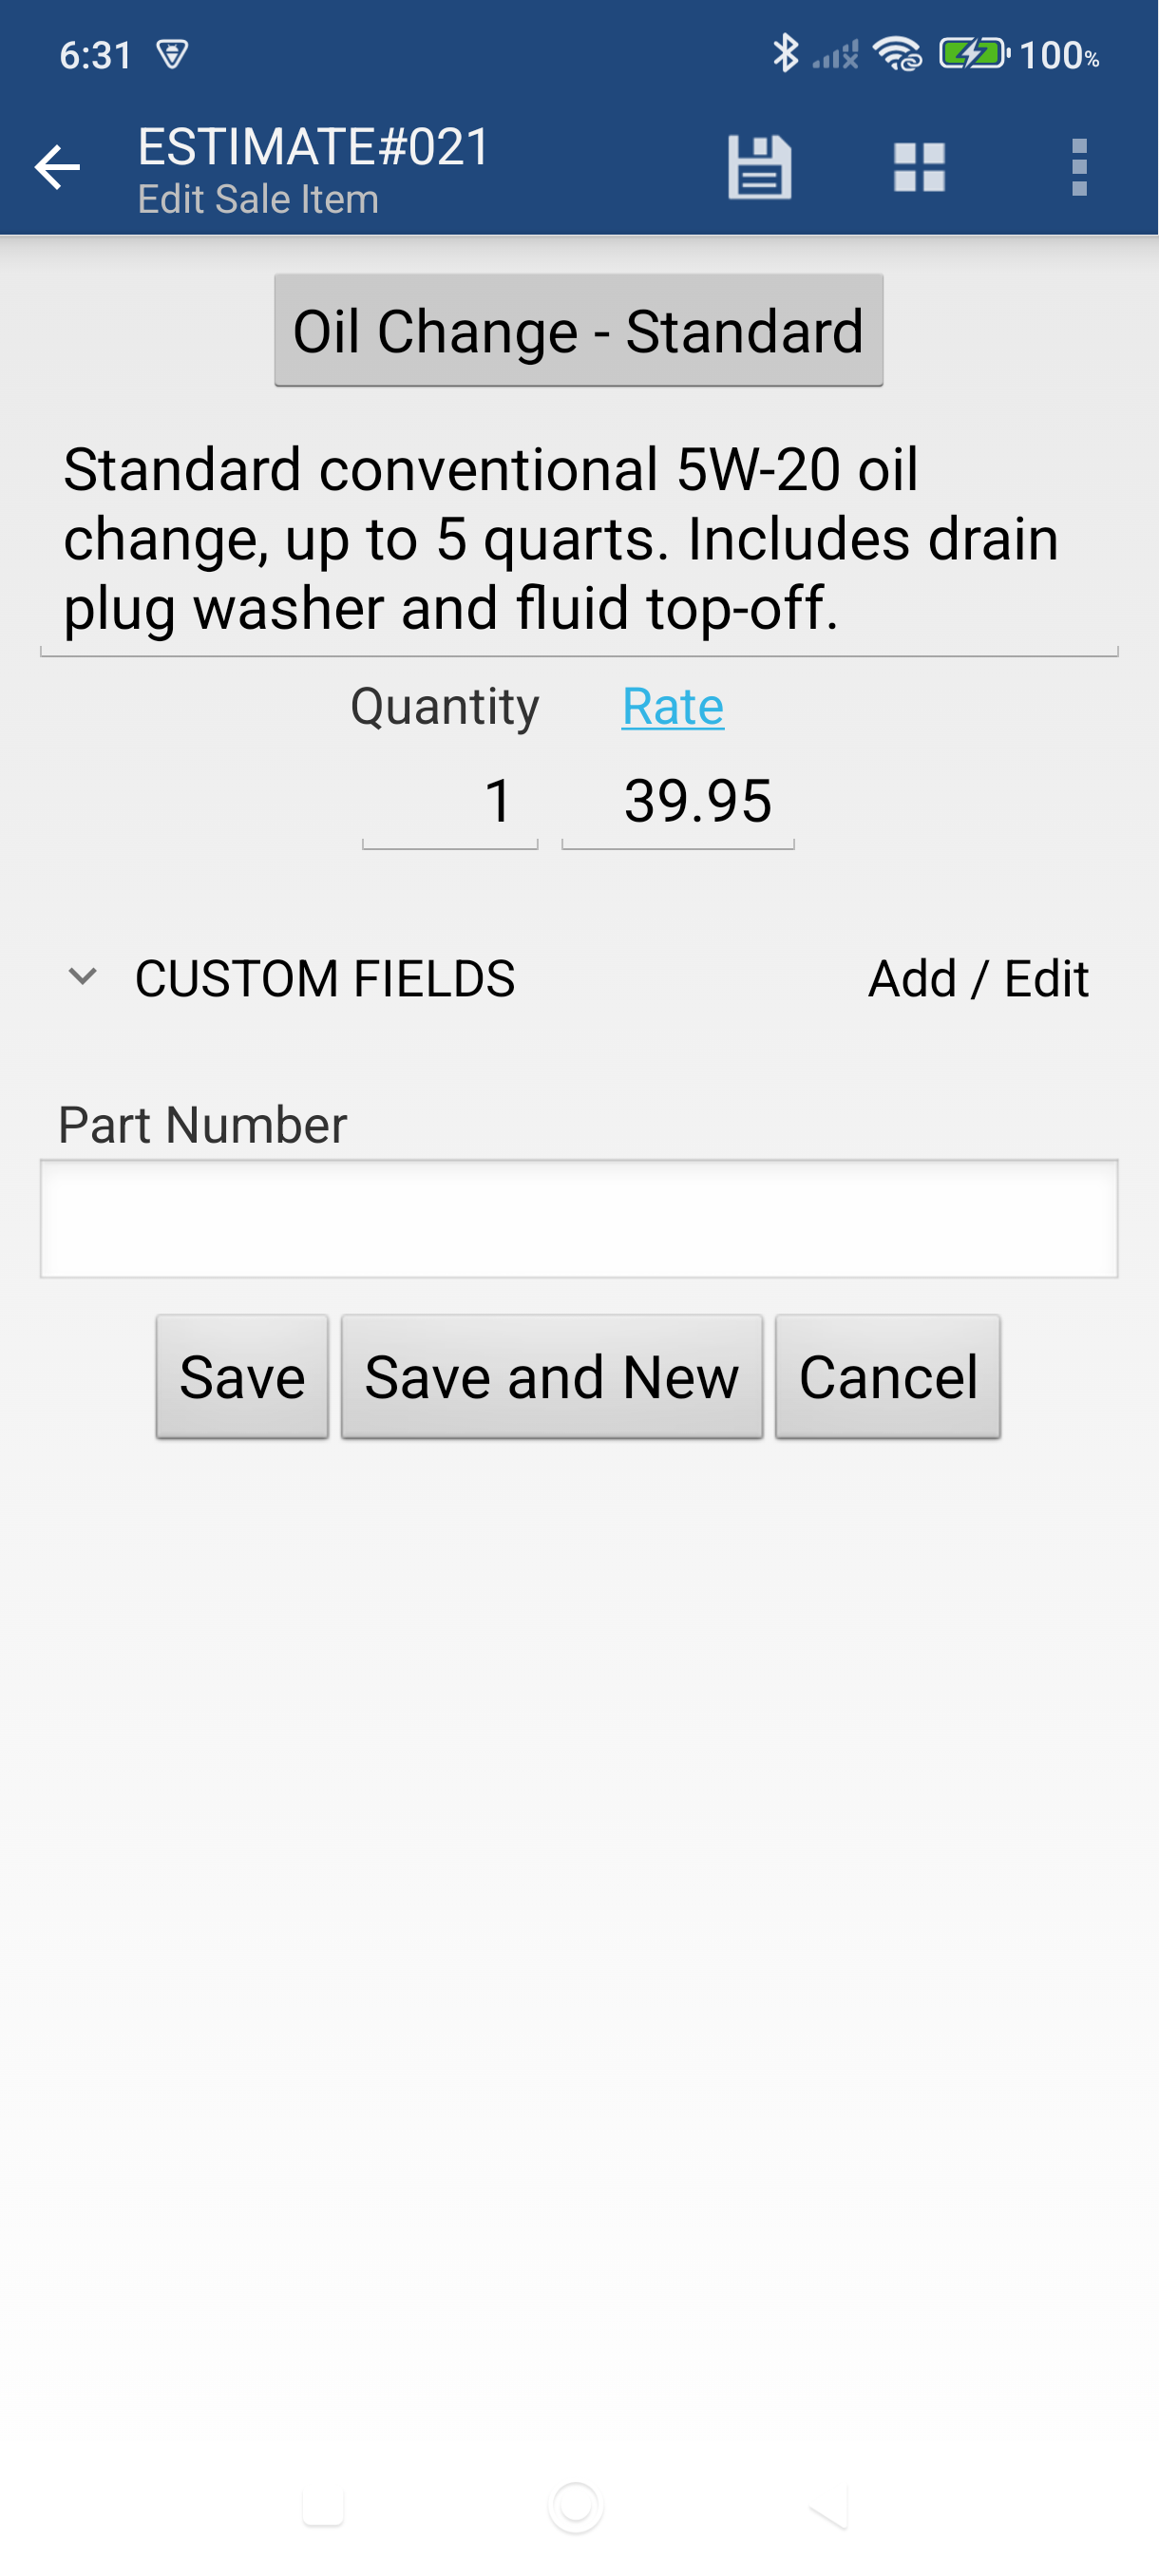
Tap the Items tab, then tap the + button to add your first line item.

-
Tap the item selector and pick a product or service. The rate and description fill in automatically.
-
Enter the Quantity, adjust the Rate if needed, and tap Save. Use Save & New to add multiple items in a row.
-
To send the quote, tap the Share icon > Send as email — the same email flow as invoicing applies.
Good to Know
- Statuses for quotes: Pending, Closed-Won, and Closed-Lost (customizable in Settings). Update the status once the customer responds.
- When the customer accepts, open the quote and tap Edit (pencil icon) > Convert to invoice. All line items and customer details carry over automatically.
- You can also convert a quote to a Sales Order (Edit > Convert to order) if you need a fulfillment step before billing.
- The quote and the resulting invoice are linked — use More menu > Converted to or Created from to navigate between them.
Still stuck? Contact Support for help.